Setup Kali In Vmware
by jake
We currently use Kali Linux for our pen testing and livestreams, Kali is a Linux distro targeted towards penetration testing, with hundreds of tools included by default. More information about the distro can be found on the Kali Linux website.
This post aims at guiding new users through the basic setup of a pre-configured Kali Virtual Machine (VM) on Windows using freely available tools.
- Prerequisite downloads
- Verify Download Integrity
- Install VMware Workstation Player
- Import the Kali VM
- First run
- Installing VMware Tools
Prerequisite downloads
Before we begin we are going to need to download a couple of things:
VMware Workstation Player does not support 32-bit operating systems. If you are running Windows x32 you will need to use VirtualBox instead. We will update this post later with the differences in setting up with VMware vs VirtualBox.
Verify Download Integrity
Most decent software vendors will include checksums for downloadable files. Before continuing always ensure that the files downloaded have not been tampered, by verifying the checksum of the downloaded file with the checksum provided by the vendor.
This practice should be habit for any file downloaded.
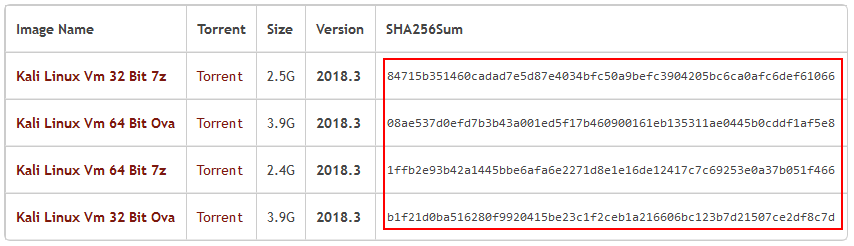
The Kali checksums can be found next to the download link selected:
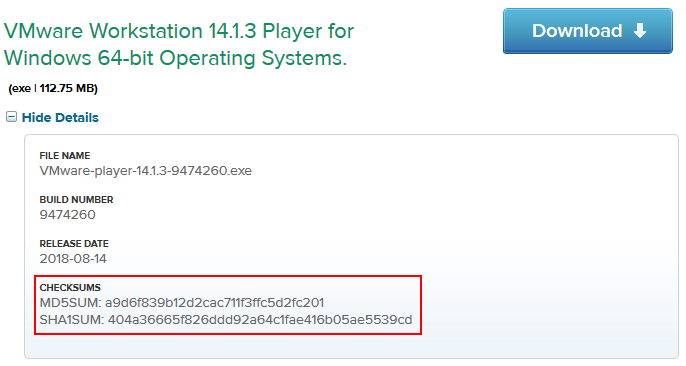
VMware place the checksums under the show more accordion:
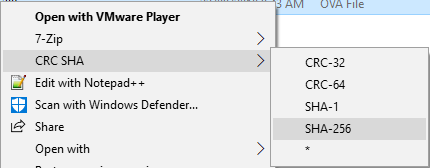
7-zip is able to verify checkmsums of any file through a right-click context menu. Right-click a file and select CRC SHA > [checksum type]
This will open a progress window, once complete a dialog will appear with the calculated checksum of the local file:
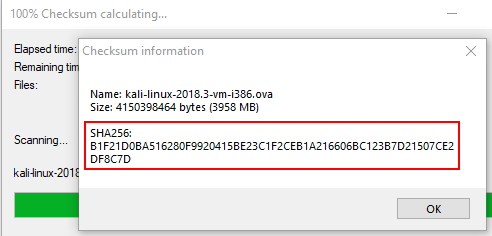
Ensure that the calculated checksum matches the one found on the vendors website.
Install VMware Workstation Player
Once downloaded, run the .exe and follow the prompts to install. Default values are fine, but as always read every step and ensure that it is not installing other crapware.
Import the Kali VM
If you downloaded the 7z image from the Kali website, be sure to extract the archive and make note of the path to the extracted folder before continuing.
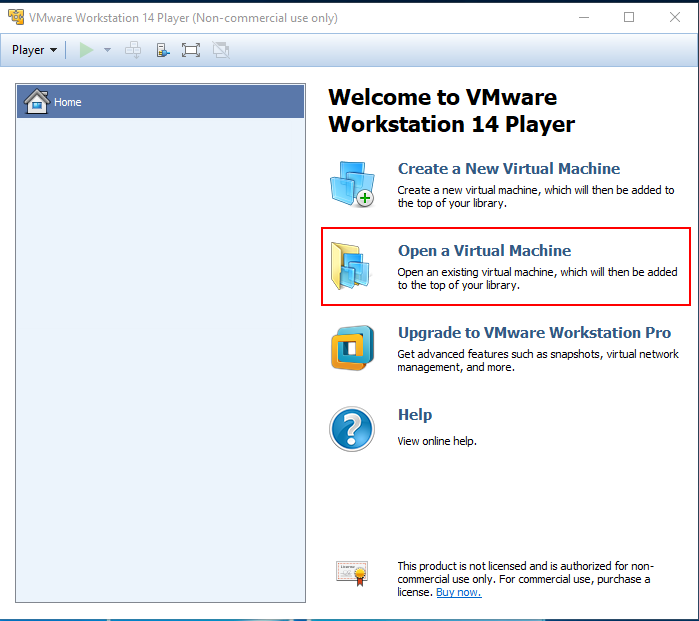
Once installed, open the VMware Workstation Player application. In the main window click the Open a Virtual Machine button.
In the Open Virtual Machine window that appears, browse to the location of the extracted 7z or the location of the downloaded .ova file. There should only be one file to select from, a .vmx file for the 7z option or the .ova file directly.
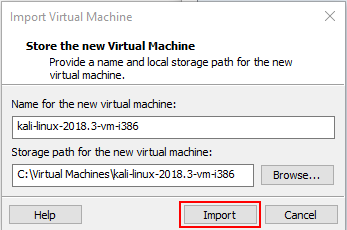
An Import Virtual Machine dialog will appear, once ready, click the Import button to begin the extraction and import of the VM.
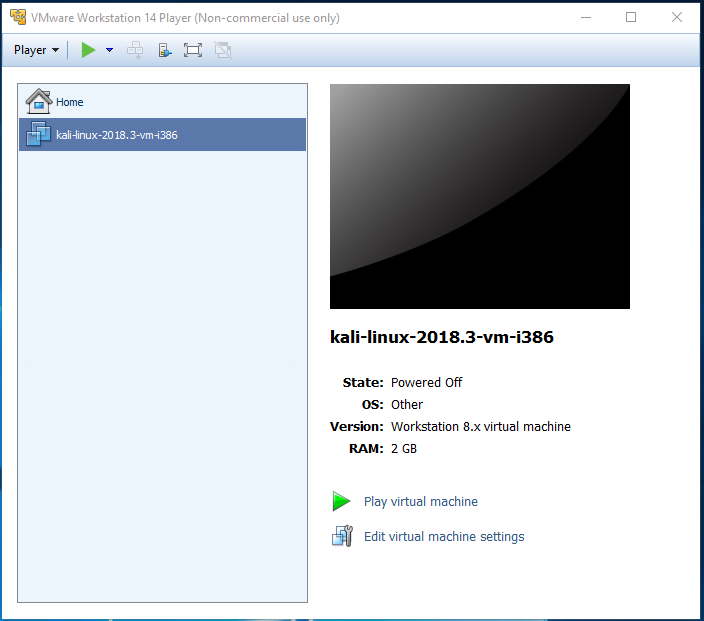
Wait for the progress bar to complete, if successful the VM should appear in the VMware main window:
First run
Before booting the up the VM for the first time it is always worth checking the VM Settings. The default values should be fine for most users. If you installed the 64-bit Kali and have the spare RAM and processors, you can increase some of the VMs resources to improve performance.
Once you are happy with the settings, click any of the play buttons to turn on the machine.
The first time you boot up the VM there are a couple of house-cleaning tasks that should be performed. First boot can take some time while the VM configures itself, this is typically a once off thing and subsequent boots should be faster.
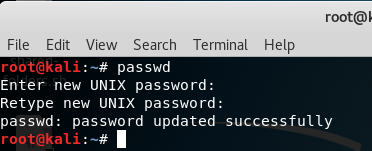
The first time you log in the default credentials are root:toor. Once logged in the first thing we want to do is change those credentials to something more secure.
Open the terminal by clicking the **$** icon on the left. Enter the command _passwd to update the current users password. Note that when entering the new password, any characters entered when setting the password will not be displayed and will not be masked by * characters the same way Windows and other Operating Systems will:
The next thing to do is to update any software and the distro. This can be done my running the following sequence of commands:
apt-get update
apt-get upgrade -y
apt-get dist-upgrade -y
These commands can also be chained with && to perform all 3 tasks in one line:
apt-get update && apt-get upgrade -y && apt-get dist-upgrade -y
Depending on your internet connection and the resources given to the VM this could take a while first time through, the more frequently these commands are run, the quicker it will be.
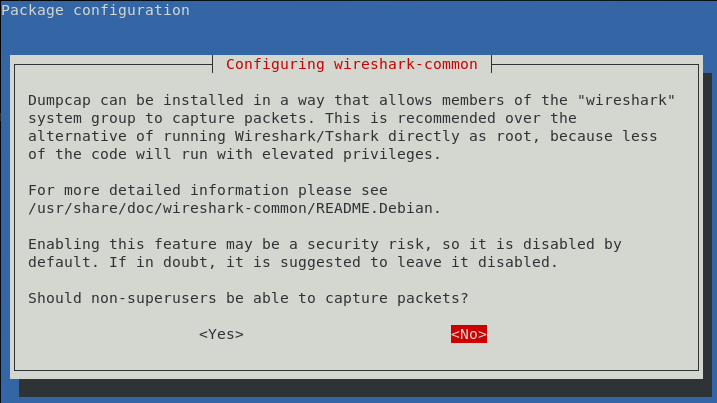
If any dialogs appear, press [space] to go with the default values.
Once complete, reboot the VM to ensure Kernel updates are also installed.
Installing VMware Tools
The VMware tools allow better Host-Guest interactions, including copy/paste, drag and drop file transfers and shared folders etc.
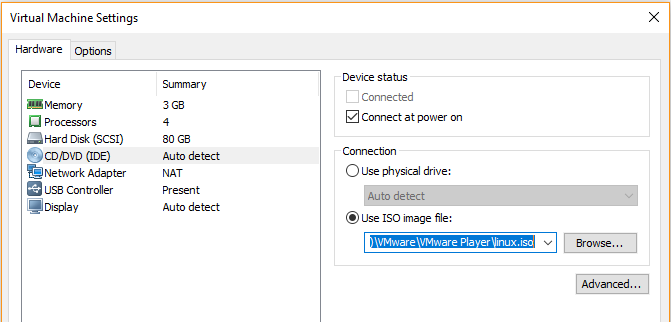
If (like me) you have a laptop or desktop without a CD drive you might run into the following error:

When this happens, you can mount the .iso file directly. Shut down the guest VM, then right-click it and select settings. Click the CD/DVD (IDE) device, and select the Use ISO image file radio. Browse to the location you installed VMware Workstation and select the linux.iso file. By default this file can be found at C:\Program Files (x86)\VMware\VMware Player\linux.iso
Boot up the VM and log in. Because we are 1337 h4x0rz we are not going to use the GUI to install the tools.
tags: